

How to build an extraction template
Once screening has settled which papers are in, extraction turns each included paper into structured data. You design the form once — the extraction template — and every extractor fills the same form for every included paper, so the answers line up into an evidence table instead of a pile of free-form notes. This guide covers building that form; distribution hands it out.
Open the Template Builder
Section titled “Open the Template Builder”Sidebar → Extraction Setup → Template builder. The page has three panels: the collapsible Question Bank on the far left, Template Structure in the middle where you build, and Form Preview on the right showing the form exactly as extractors will see it, filled with sample answers.
Name the template in the field next to Template: at the top. The badges beside it track state as you work: Draft until you publish, Unsaved when you have changes pending, and Editable while the template can still be changed.
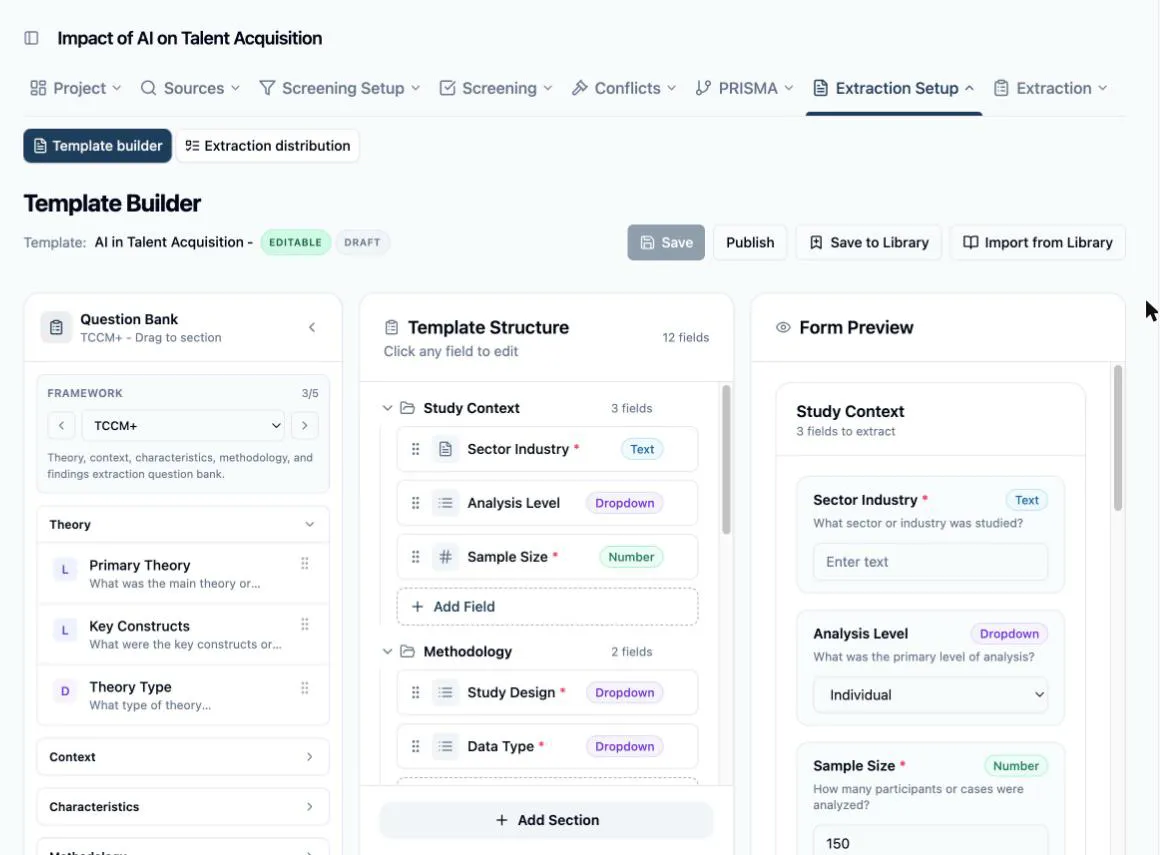
Only the project owner and assistants can edit — a reviewer who opens the page sees the same structure in Read-only mode.
Add sections and fields
Section titled “Add sections and fields”Sections group related fields — the section names become the form’s navigation tabs for extractors, so name them by topic (Add Section suggests Study Characteristics as the pattern).
-
Click Add Section and name it.
-
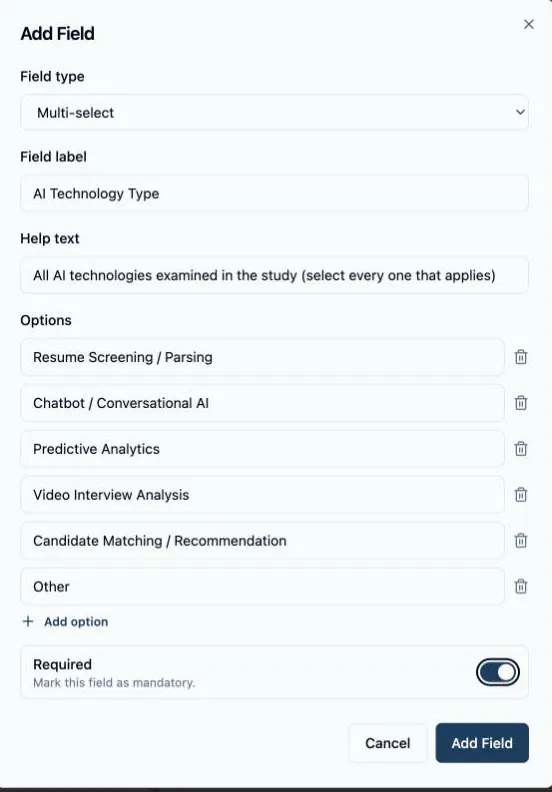
Click Add Field inside the section. The field editor asks for a Field type — Text (Short), Text (Long), Number, Dropdown, Multi-select, or Yes/No/Unclear — a Field label, and optional Help text, which extractors can pop open next to the field while filling it in.
-
Configure the type: Dropdown and Multi-select take a list of Options (Add option to extend it) — new fields start with Other and Not stated already on the list as an escape route for answers that don’t fit; delete or rename either one if the field doesn’t need it. Number takes optional Min, Max, and Unit constraints. Toggle Required for fields no submission may leave empty.
-
Click Add Field to place it. Click any placed field to reopen the editor, drag it by its handle to reorder, or delete it with the trash icon. Sections can be renamed or deleted from the icons that appear on hover.
The builder checks the template as you go and blocks a publish that would produce an unfillable form — a dropdown with no options, a number field whose minimum exceeds its maximum, or two fields with the same label in one section all get flagged inline.
Start from the Question Bank
Section titled “Start from the Question Bank”The Question Bank panel carries five prebuilt frameworks — PICO+, SPIDER+, TCCM+, SPICE, and MMAT — switchable from the Framework selector. Expand a category and drag any question straight into a section: it arrives as a fully configured field, type and options included, which you can then edit like any other.
MMAT is the odd one out and worth knowing about: it is the MMAT 2018 methodological-quality appraisal, with a section per study design and each criterion as a Yes/No/Can’t tell question. Dragging in the section that matches your corpus puts quality appraisal into the same form as your data extraction, so it gets answered paper by paper along with everything else.
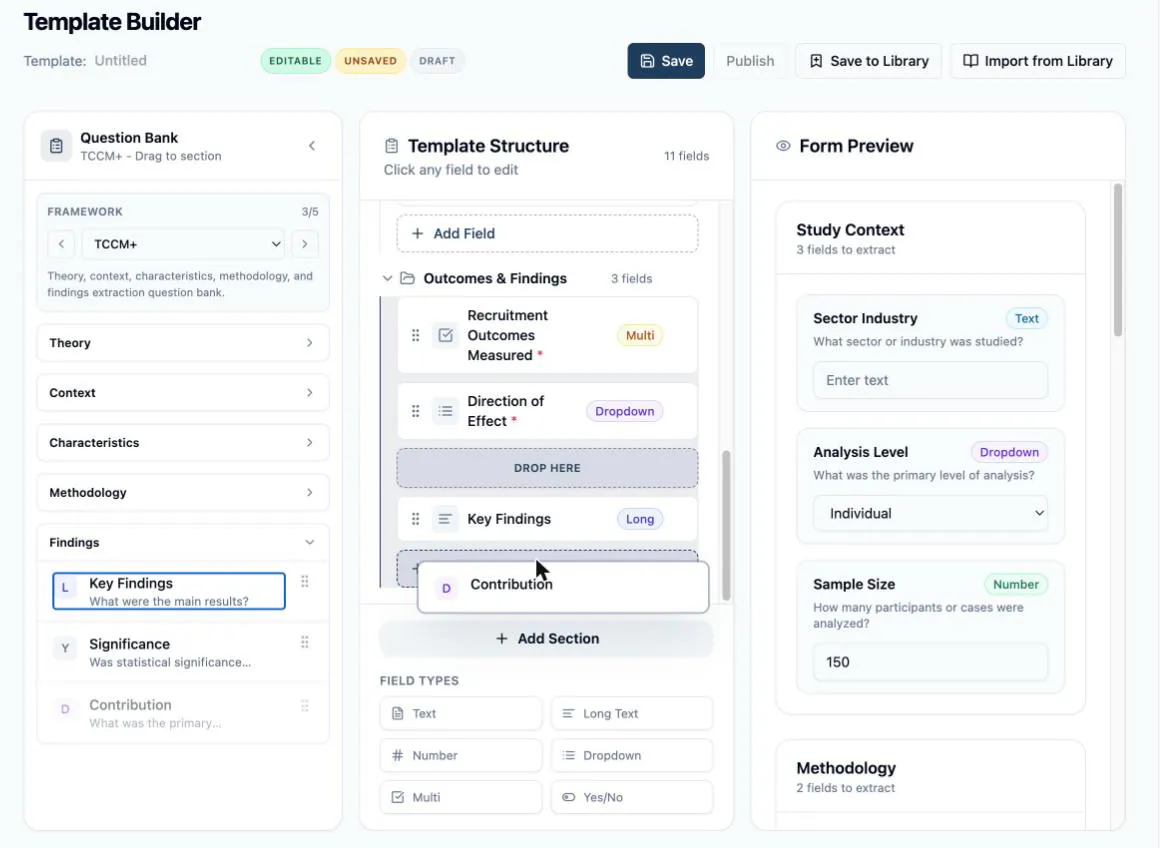
Save, preview, publish
Section titled “Save, preview, publish”Save stores your work; check the Form Preview to see what extractors will actually face. Extractors can only open the form once the template is published — a distribution can exist beforehand, but a reviewer opening a paper sees Template not ready until you publish. Clicking Publish shows a warning dialog first, because publishing starts a countdown of sorts: once reviewers begin extracting, the template locks.
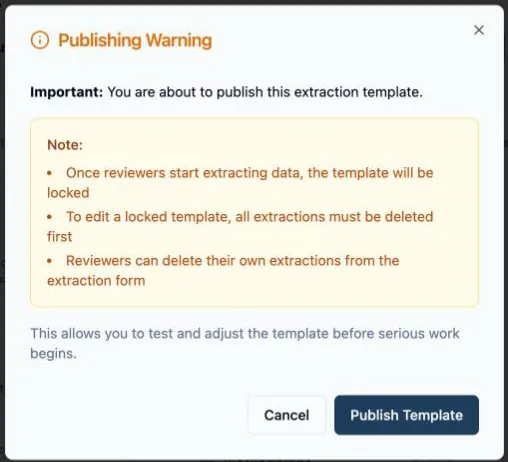
While no extraction has been submitted yet you can still Unpublish, edit freely, and publish again — reviewers simply can’t extract in the meantime. That window is for testing: run one paper through the form yourself and fix what reads badly before serious work begins.
When the template locks
Section titled “When the template locks”The first submitted extraction locks the template — the badge switches to Locked with the extraction count, and Edit Template explains the way back: every extraction must be deleted (each extractor deletes their own from the extraction form) before the structure can change again.