

How to use the evidence table
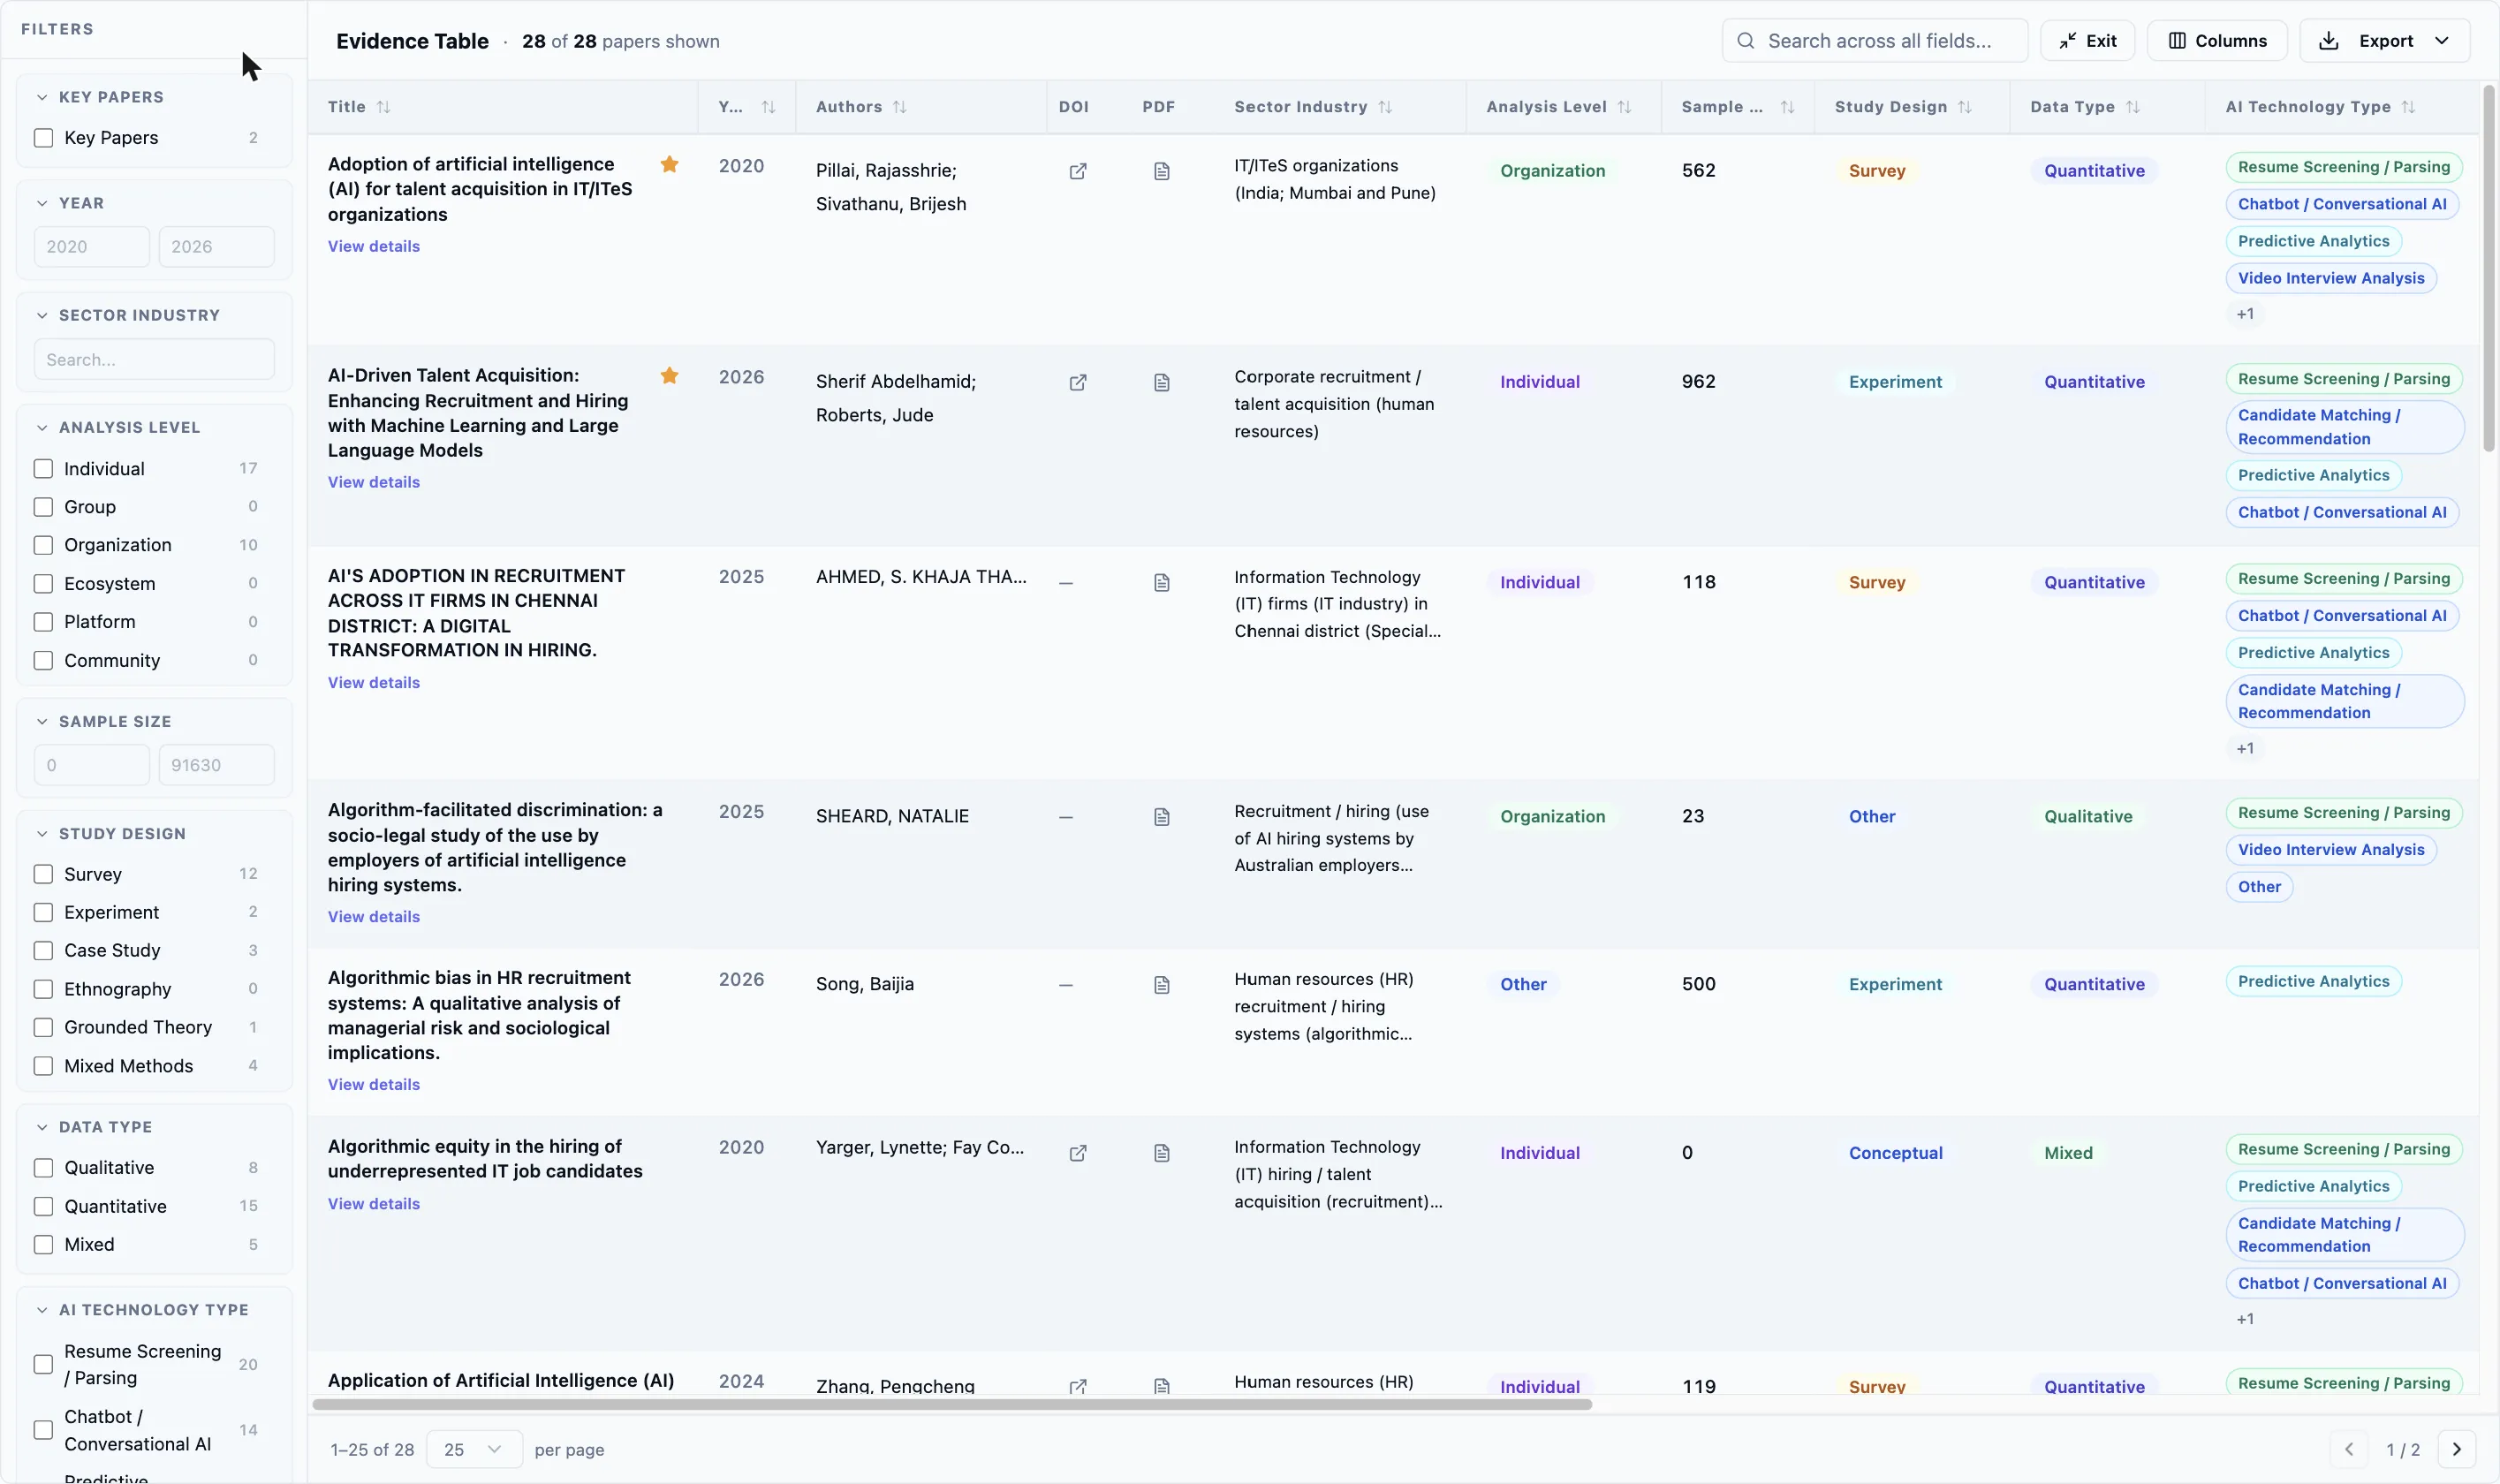
The evidence table is your extracted data in one grid: one row per paper, one column per field of your extraction template. It’s where you go to compare studies side by side, find the subset you want to write about, and pull the whole thing out as a CSV. Open it from Results → Evidence Table.
What lands in the table
Section titled “What lands in the table”A paper appears here once its extraction is finished, not merely started:
- On papers assigned to an extractor and a verifier, the row appears when the verifier validates it — the validated answers are what you see.
- On papers extracted by one person with no verifier paired, the row appears as soon as the form is submitted.
So a paper that’s still being extracted, or extracted but waiting on its verifier, is simply not in the table yet. If the count looks short, that’s the first thing to check — Data Extraction → Monitor shows exactly who’s still working.
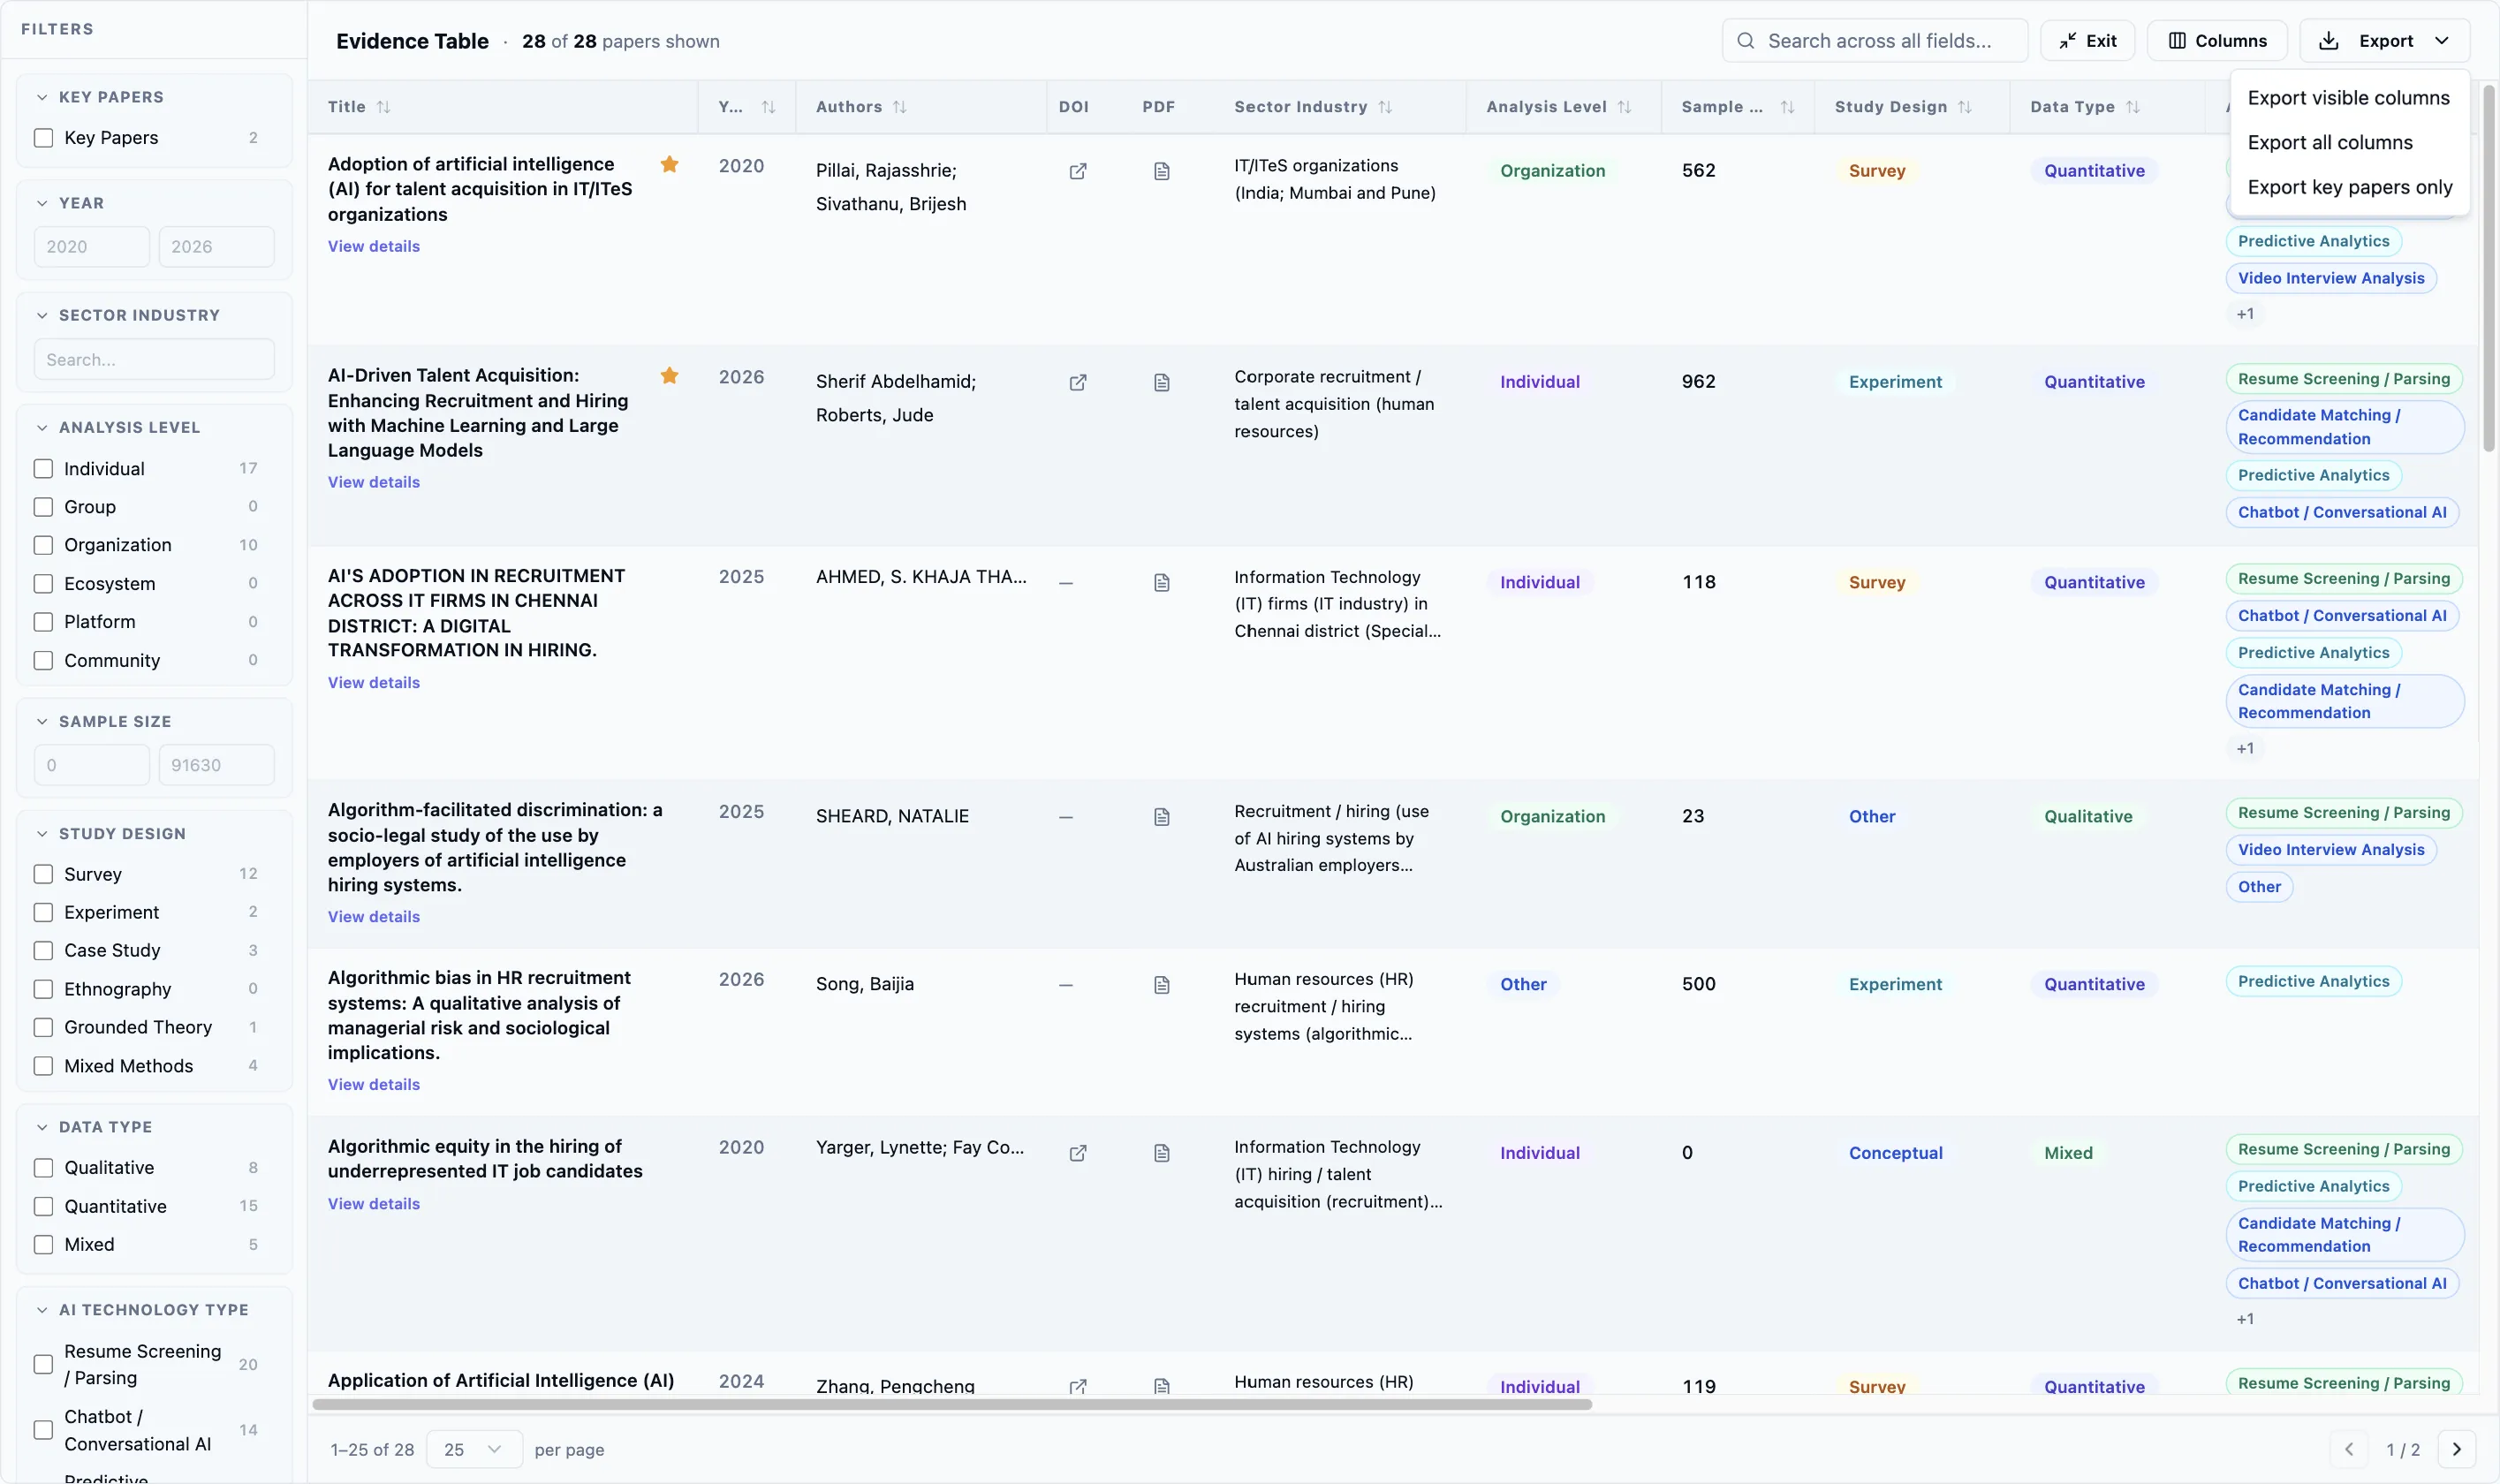
The first five columns are fixed: Title (which stays pinned as you scroll sideways), Year, Authors, DOI — the icon opens the paper at doi.org — and PDF, which opens the full text. Everything to the right is your template, in the order you built it. The toolbar keeps a running N of M papers shown, where M is the whole extracted set and N is what your current filters leave.
Narrow it down
Section titled “Narrow it down”The Filters sidebar is generated from your own template — each field gets the control its type deserves:
- Dropdown, multi-select and yes/no fields become checkbox lists, with a count beside every option so you can see how the corpus splits before you click.
- Number fields become a Min / Max pair — leave one end blank for an open-ended bound.
- Text fields get a search box that matches inside the answer.
Above your fields sit two built-in filters: Key Papers and Year. Filters combine, and each one you set adds a chip to the toolbar — click the chip’s × to drop just that one, or Clear all in the sidebar to start over.
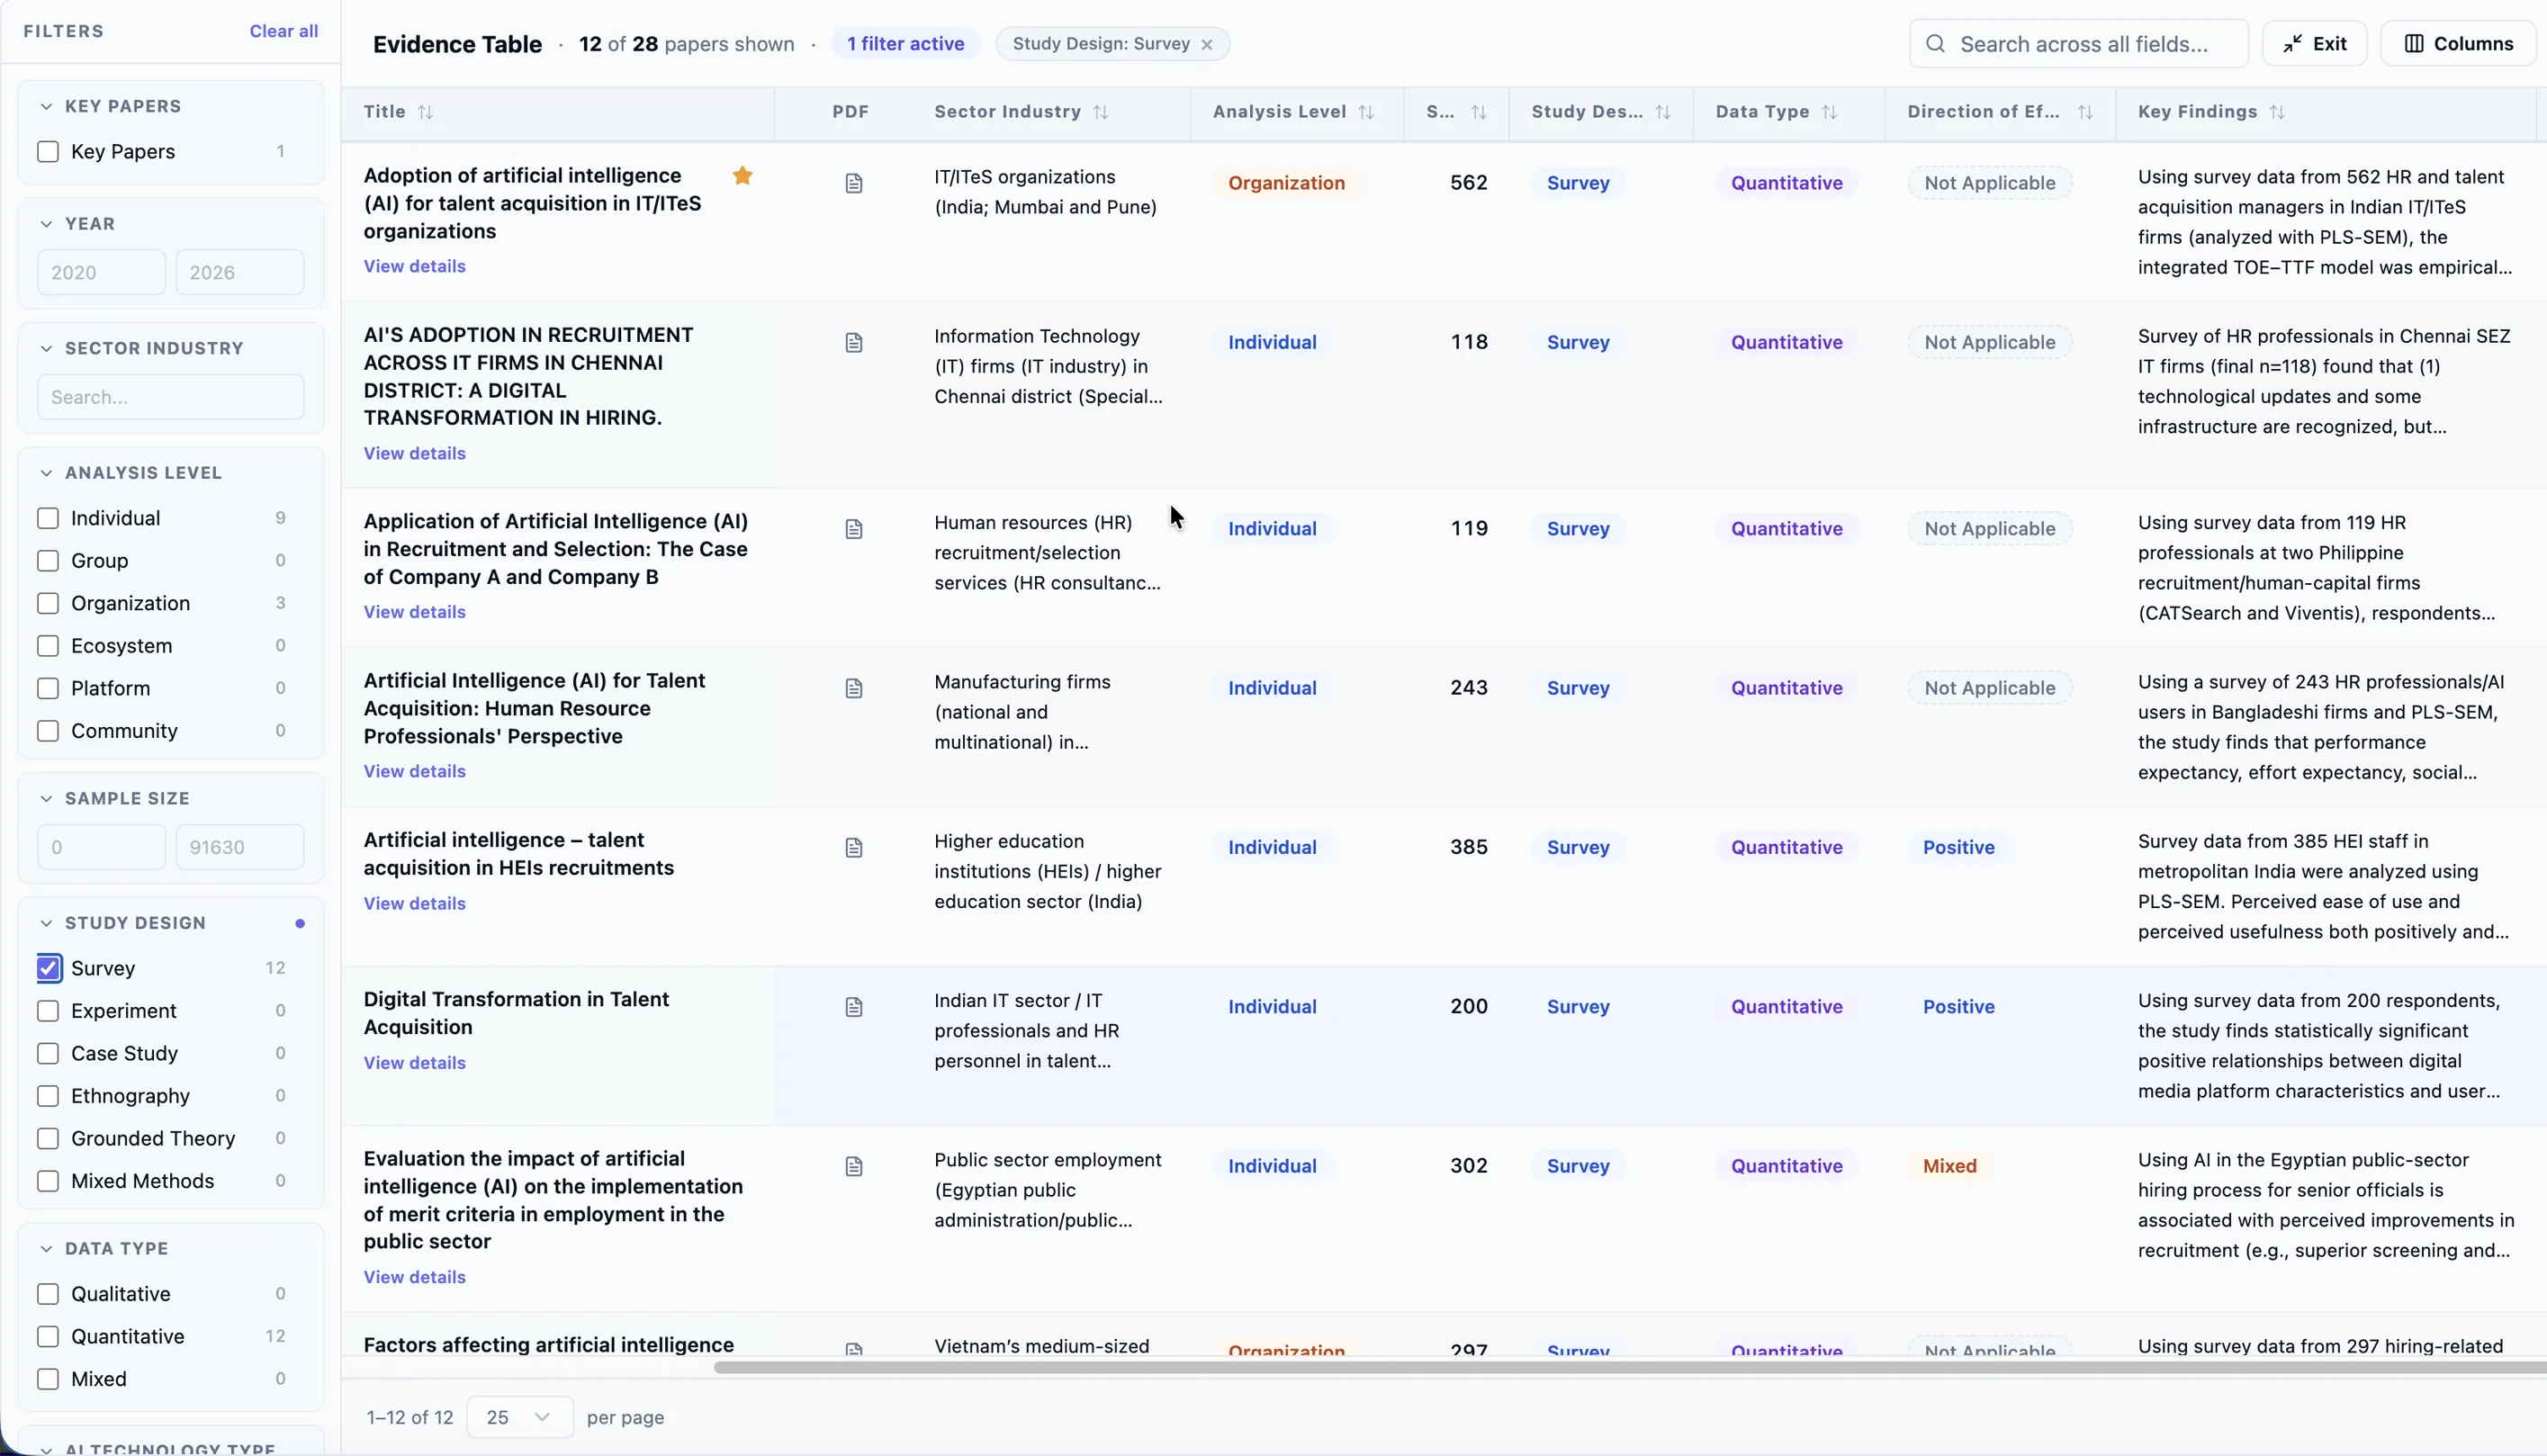
The Search across all fields box is the blunt instrument for when you don’t know which field holds what you’re after: it matches the title, abstract, journal, DOI and authors and every extracted answer on the paper. The option counts in the sidebar deliberately ignore it — they describe your filters, so they don’t move around while you type.
Click any column header to sort by it: first click ascending, second descending, third back to unsorted. Drag the divider at the right edge of a header to widen a column, and use Full screen when the template is wide — the grid takes over the whole window and the button turns into Exit (Esc brings you back too).
Look at one paper
Section titled “Look at one paper”Click a row — or its View details link — and a panel opens on the right with two tabs: Abstract, and Extraction, which lists that paper’s answers grouped by your template’s sections and skips the fields nobody filled. Drag the panel’s left edge if you want it wider.
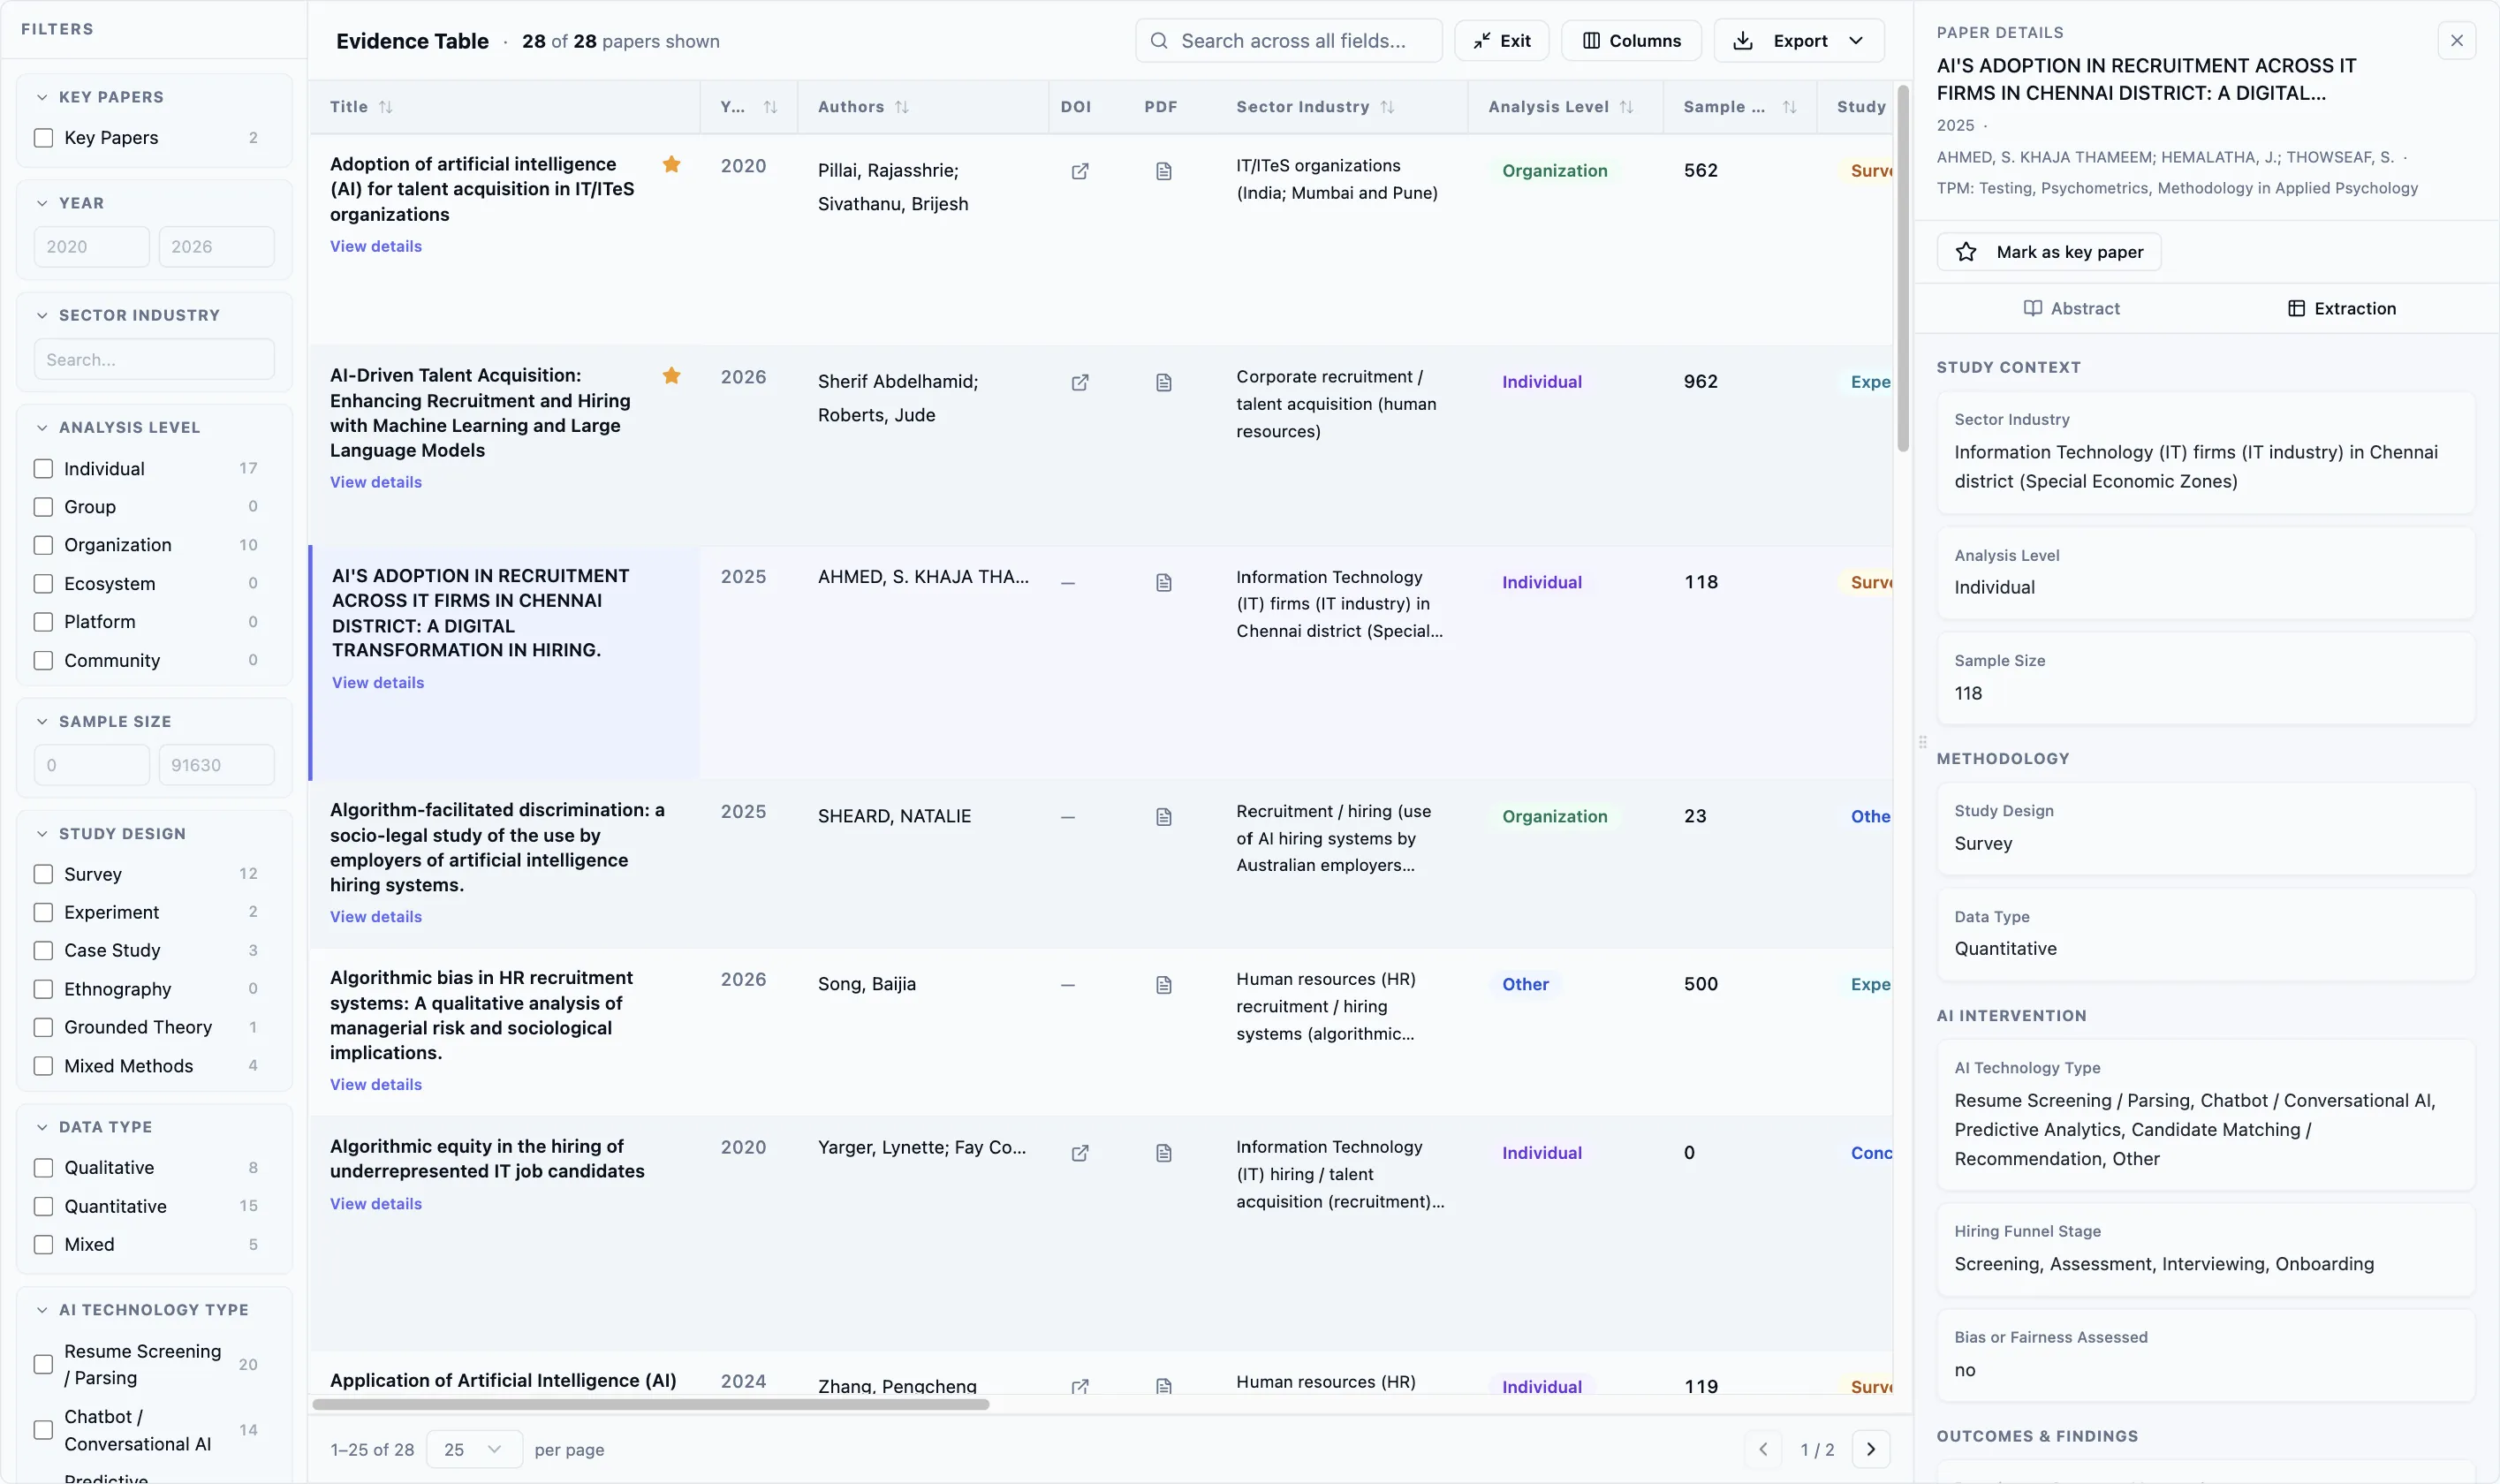
Mark as key paper flags a landmark study. Key papers get an amber star on their title, get their own filter in the sidebar, and can be exported on their own — useful for the handful of studies your discussion leans on. The star travels with the paper across Littview, so it’s the same flag you see on the included-papers list.
The PDF icon opens the paper in a read-only viewer carrying the highlights whoever extracted it linked to each field, so you can check an answer against the passage it came from without leaving the table.
Export it
Section titled “Export it”The export always covers the full filtered and sorted set, not just the page you’re looking at — so filter first, then export.
-
Set the filters, search and sort you want the export to reflect.
-
Open Columns and untick any field you don’t want — the list is your template’s fields, grouped under their section names.
-
Click Export and pick one: Export visible columns (what you set in step 2), Export all columns (every template field regardless), or Export key papers only.
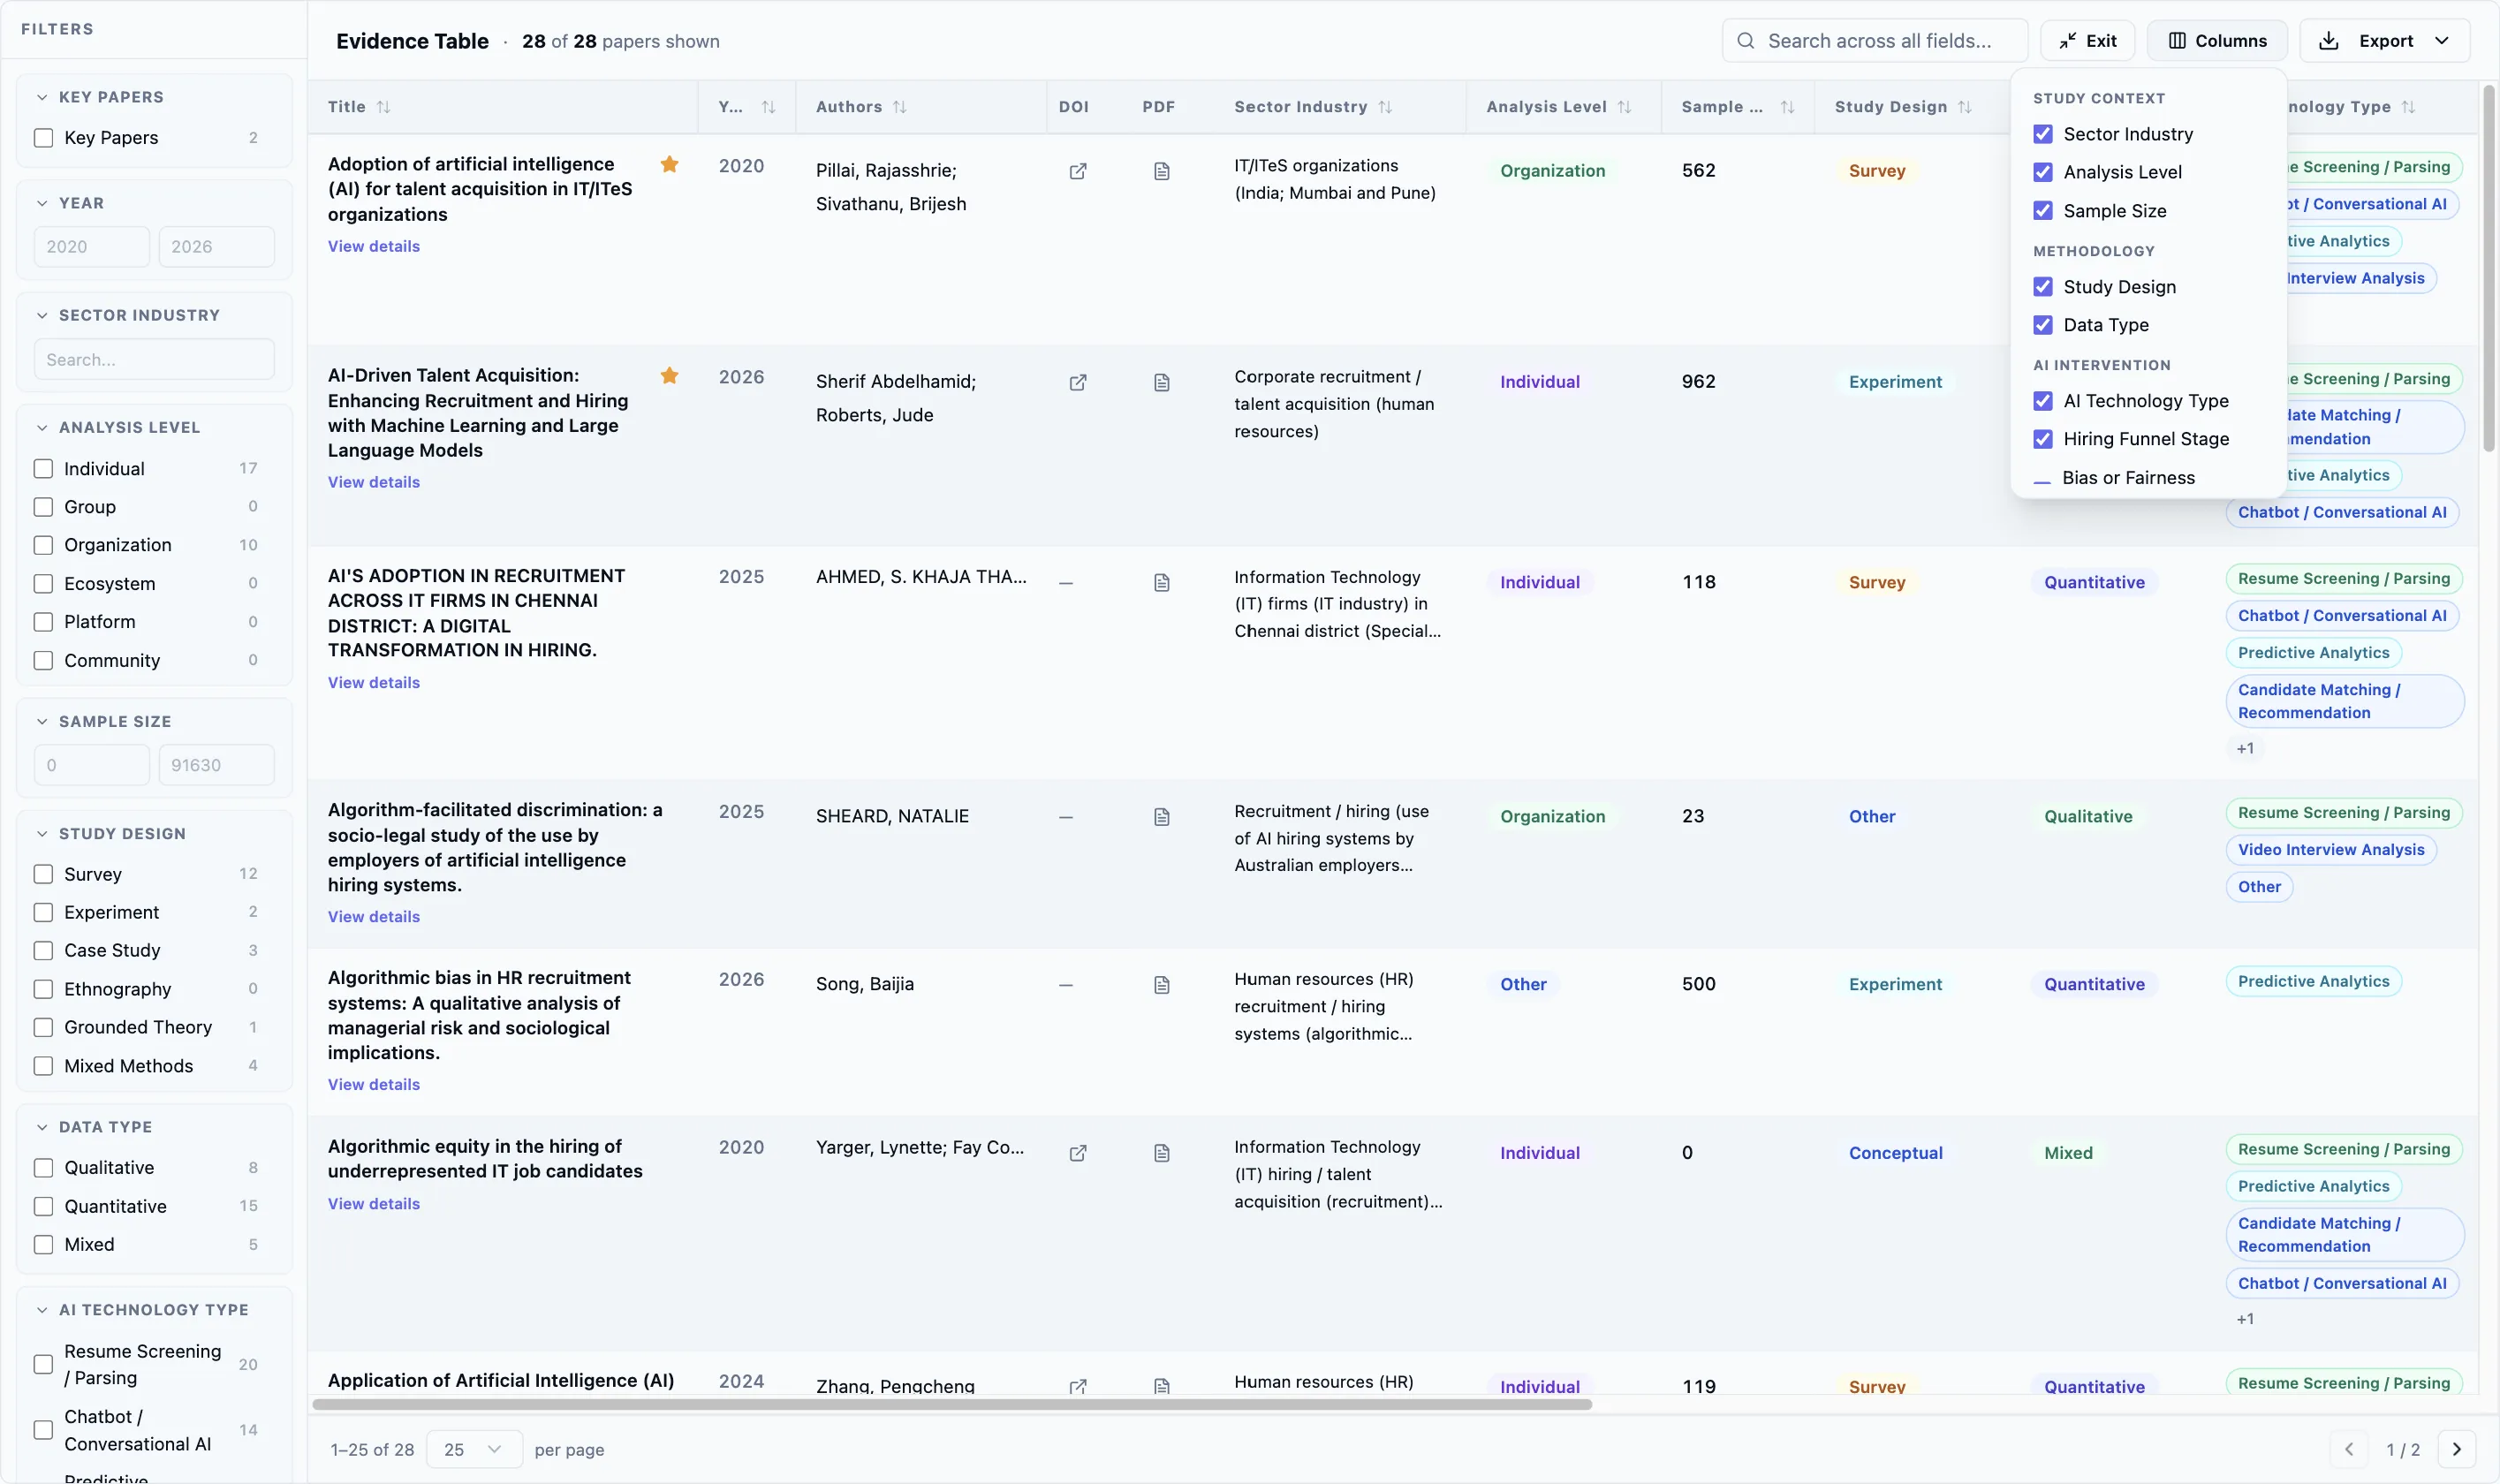
Export sits beside it, and the mode you pick decides what goes in the file:
The file downloads as CSV with Title, Authors, Year, Journal, DOI and a Key Paper column in front of your fields. Multi-select answers arrive as one cell, values separated by semicolons.