

How to highlight evidence in the PDF
A criterion tag records what you decided. A highlight records what in the paper made you decide it. In the Screening Workspace you can select a passage — in the PDF, or in the abstract when there’s no PDF — and attach it to the criterion category it justifies, so the quote is stored with your decision instead of living in your memory.
Link a highlight to a criterion
Section titled “Link a highlight to a criterion”Two ways round the same loop: start from the criterion, or start from the passage.
Start from the criterion. Every category in Inclusion Criteria and Exclusion Criteria carries a small paperclip button beside its name — hover it and it reads Link evidence from PDF.
-
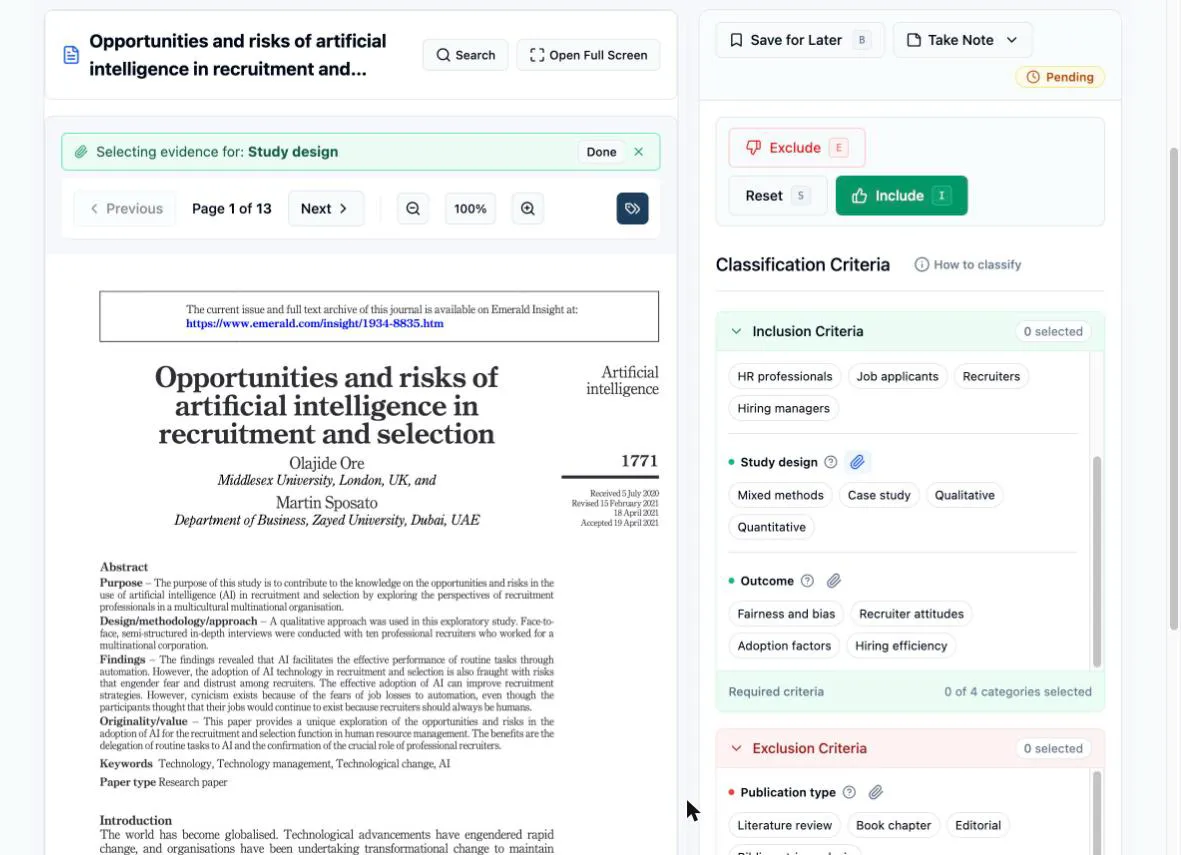
Click the paperclip on the category you’re collecting evidence for. It turns blue, and a bar appears above the paper naming it — Selecting evidence for: Study design, say — green for an inclusion category, red for an exclusion one.
-
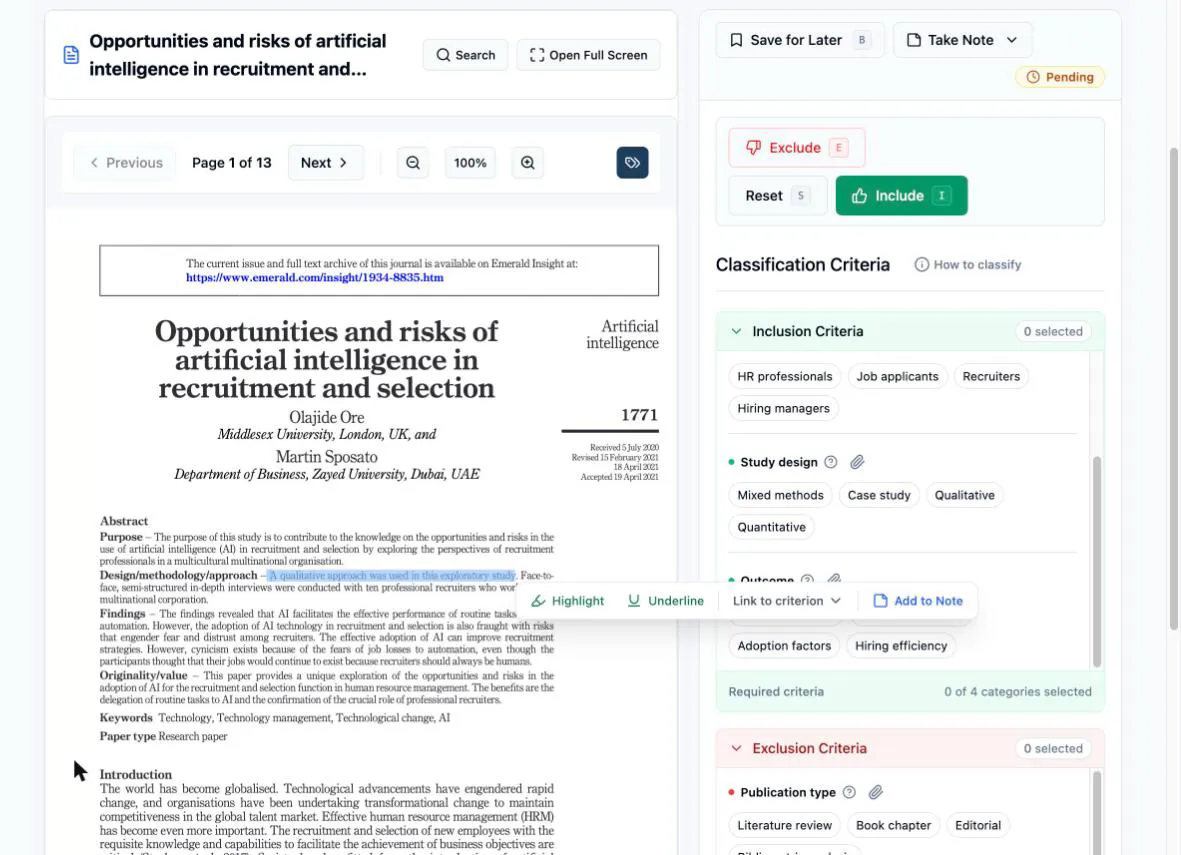
Select the passage in the paper. A small menu appears beside your selection with Highlight and Underline.
-
Click Highlight (or Underline). If the category has tags, the menu lists that category’s tags — pick the one the passage supports. If it has no tags, the highlight attaches to the category itself straight away.
-
Keep selecting passages for as long as you need; the bar stays up. Click Done when you’re finished with that category.
Picking a tag in that menu does double duty: it links the highlight and selects that tag on the right, marking the category Selected. Highlighting the sentence that convinced you is enough to justify your decision — you don’t have to go back and click the same tag again.
Start from the passage. If no paperclip is active, select any passage and the menu offers more: Highlight, Underline, Link to criterion, and Add to Note, which drops the quote straight into a note instead of attaching it to a criterion. Choosing Highlight, Underline, or Link to criterion opens the full list of the project’s criteria, grouped as Include because… and Exclude because…; expand a category to reach its tags.
Highlights save the moment you create them. There’s no Save button, and you don’t have to have decided the paper first — collect the evidence as you read, then call it.
What a highlight looks like
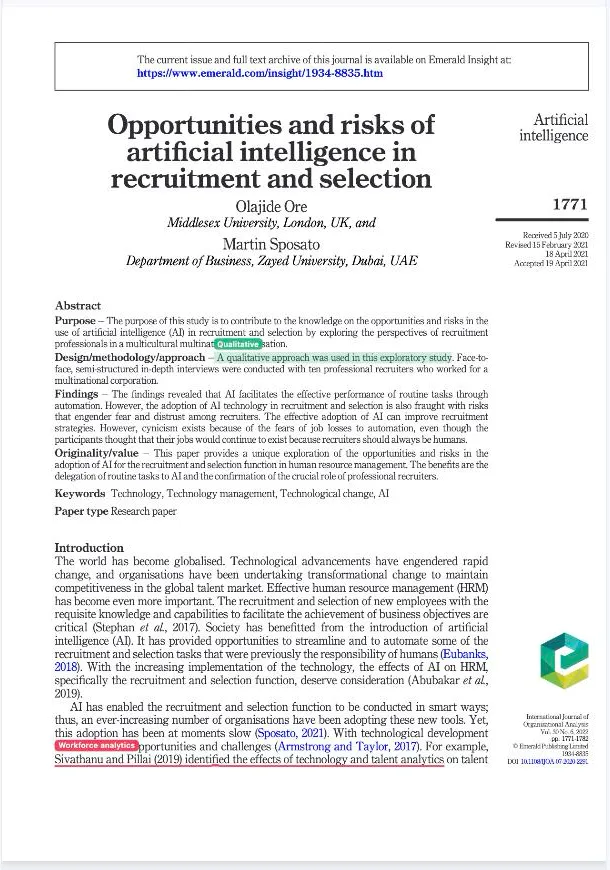
Section titled “What a highlight looks like”The color follows the criterion: green for an inclusion category, red for an exclusion one. Highlight tints the passage in that color; Underline leaves the text clean and rules a colored line beneath it, which reads better on a page you’ve already marked up heavily.
A small chip above the passage names the tag it’s linked to — or the category, when the highlight is attached to a category with no tags — so a page of marks tells you why each one is there. The tags button in the viewer toolbar — its tooltip reads Hide category labels — clears the chips while you read, and brings them back.
Review and remove your evidence
Section titled “Review and remove your evidence”As soon as a category has evidence, its paperclip shows a count and an Evidence (N) list appears beneath its tags. Each entry names where it came from — p.4, or Abstract — and quotes the passage.
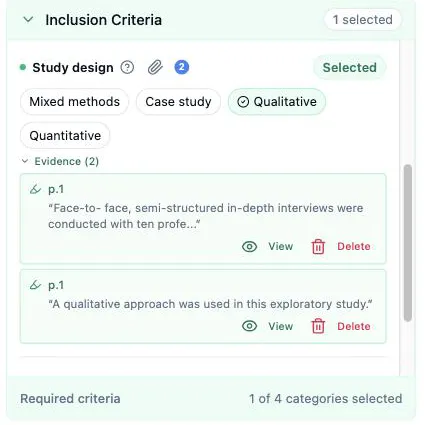
View jumps the viewer to that page and scrolls the passage into view, picked out in yellow — that’s how you re-read the evidence months later without hunting through the paper. Delete removes the highlight from the paper and from the record. The Evidence (N) heading collapses the list when the panel gets busy.
Papers without a PDF
Section titled “Papers without a PDF”When no full text is attached, the left panel shows the reference under a No PDF Uploaded badge — and the abstract is selectable in exactly the same way. Select a phrase, and the same menu offers Highlight, Underline, Link to criterion, and Add to Note.
Abstract highlights are tinted in their criterion’s color, hovering one names its tag, and they’re listed as Abstract in the Evidence list rather than by page. It’s the same evidence trail — title-and-abstract screening records its reasons as precisely as full-text screening does.
If you track the full text down and attach it with Upload PDF, the panel becomes the viewer and you highlight in the PDF from then on.
Where your evidence turns up
Section titled “Where your evidence turns up”Your workspace shows your own highlights only — you screen without seeing what anyone else marked, which is the point of independent review.
They surface where a second reader needs them. When reviewers disagree, the conflict workspace lists each reviewer’s highlights and notes beside their votes, labeled with the criterion or tag they were linked to, so whoever resolves the conflict weighs the actual sentences instead of re-reading the paper from scratch. View Full Review on any included or excluded paper replays the same evidence over the PDF — the audit trail a systematic review is supposed to be able to produce.
Next: How to use AI screening suggestions — matched criteria, confidence, and reasoning you check against the paper.