

How to build inclusion and exclusion criteria
Screening is where most of a review’s decisions get made. You design it once — the criteria reviewers choose from, and how many independent opinions each paper gets — and then everyone works through their own queue, recording decisions that carry their justification with them.
Criteria are the first half of that design. In Littview they aren’t a paragraph in your protocol: they’re a structured list you build in the Criteria Builder, and reviewers select from that list on every paper they decide. That’s what makes a decision auditable — each Include or Exclude carries the categories that produced it into your conflict view, your excluded-papers report, your PRISMA counts, and the Methods section Littview drafts for you.
How a criterion is structured
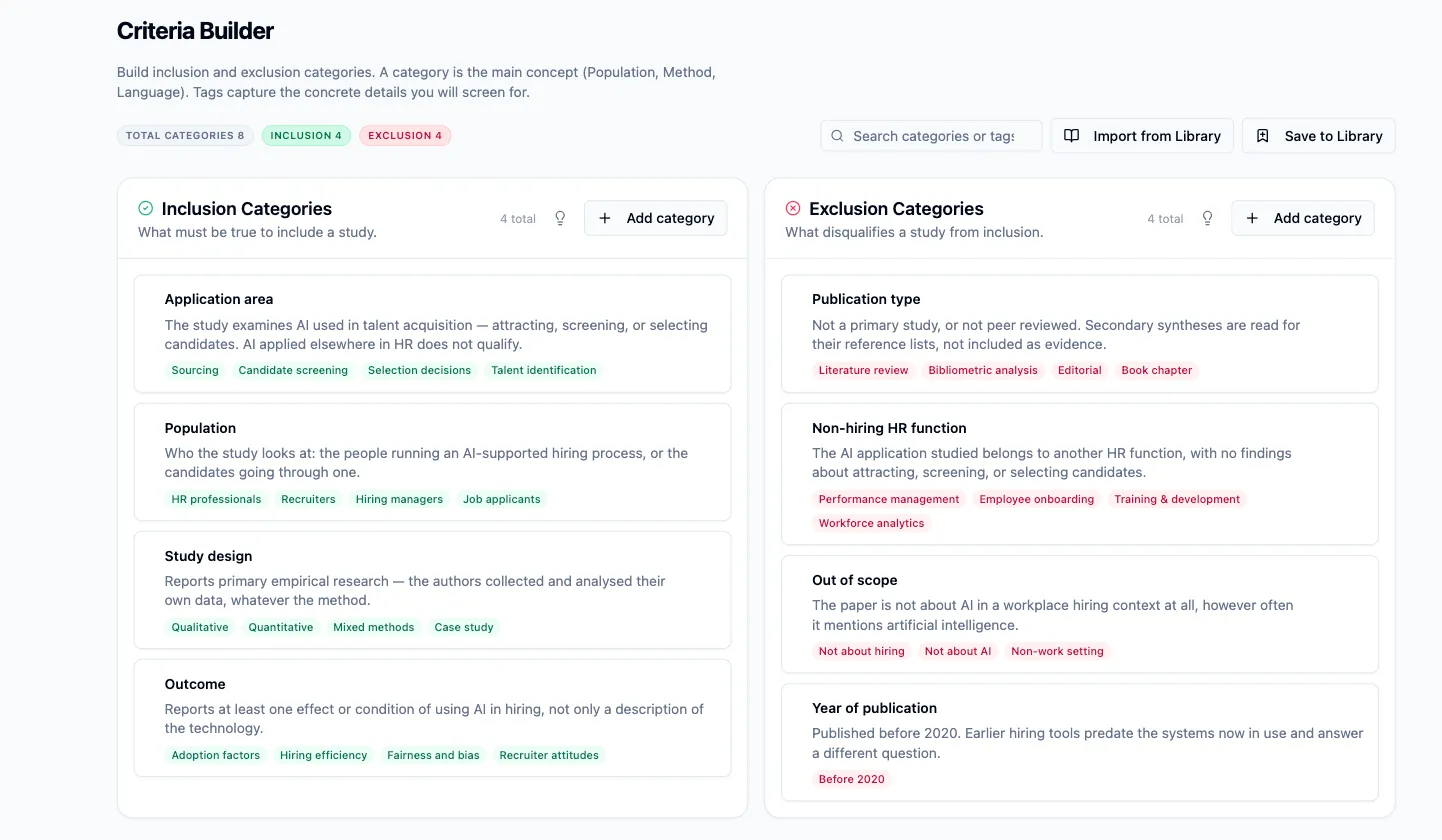
Section titled “How a criterion is structured”Open the project sidebar under Screening Setup and click Criteria Builder. The page is two lists side by side: Inclusion Categories (“What must be true to include a study”) on the left, Exclusion Categories (“What disqualifies a study from inclusion”) on the right.
Each entry in those lists has three parts, and the split between them is the thing to get right:
- Category — the concept being judged, up to 30 characters. Study type, Language, Outcome, Year of publication.
- Definition — the rule, up to 300 characters. Write it for the reviewer, not for yourself: it’s the text that appears when they hover the help icon next to the category while deciding a paper. “Be direct and testable” is the standard to hold it to.
- Tags — the concrete items the category covers. At least one is required, and tags are what reviewers actually click while screening; selecting a tag marks its category as selected on the decision.
So a category stays broad and its tags carry the specifics. Organization type with tags Tech startups, SaaS companies, B2B companies. Study type with tags Editorial, Opinion piece, Blog. The lightbulb icon at the top of each column opens worked examples of exactly this shape, one set for inclusion and one for exclusion.
Add your categories
Section titled “Add your categories”-
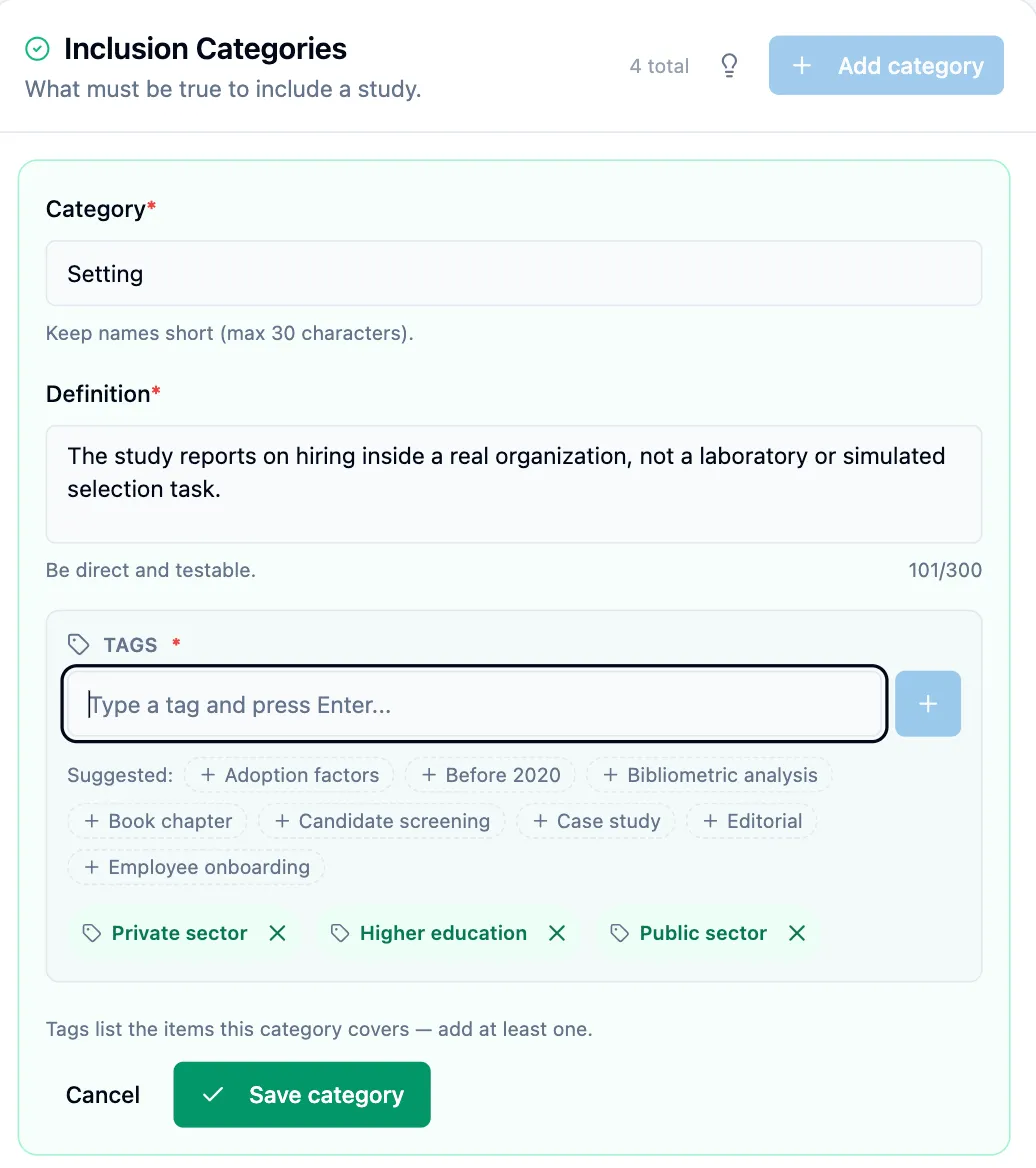
In the column you want — Inclusion Categories or Exclusion Categories — click Add category. The form opens at the top of that column, tinted green for inclusion and red for exclusion so you always know which list you’re adding to.
-
Type the Category name. Keep it short; the field stops at 30 characters.
-
Write the Definition. The counter under the box tracks you against the 300-character limit.
-
Add Tags: type one and press Enter (or click the + button) for each item the category covers. Tags you’ve already used elsewhere in the project appear as one-tap Suggested chips, which is how a vocabulary stays consistent across categories instead of drifting into near-duplicates.
-
Click Save category. It stays disabled until the category, the definition, and at least one tag are filled in.
Build both lists before you distribute papers. Reviewers can only justify a decision with the categories that exist when they make it, and papers screened against a half-finished list have to be revisited.
Edit, reorder, and delete
Section titled “Edit, reorder, and delete”Each saved category shows its definition, its tags, and a row of controls: Move up / Move down, the drag handle, Edit category, and Delete category.
Order is not cosmetic. Reviewers see your categories in exactly the order they appear here, top to bottom, in the screening panel — so put the ones that settle most papers first. Drag a category or use the arrows; the new order saves immediately.
Editing applies everywhere. Renaming a category or rewriting its definition changes what reviewers see from that moment on, including on papers already decided — the recorded decisions point at the category, not at a copy of its wording. Fixing a typo is fine; redefining the rule mid-screening means the decisions on either side of the change were made against different rules.
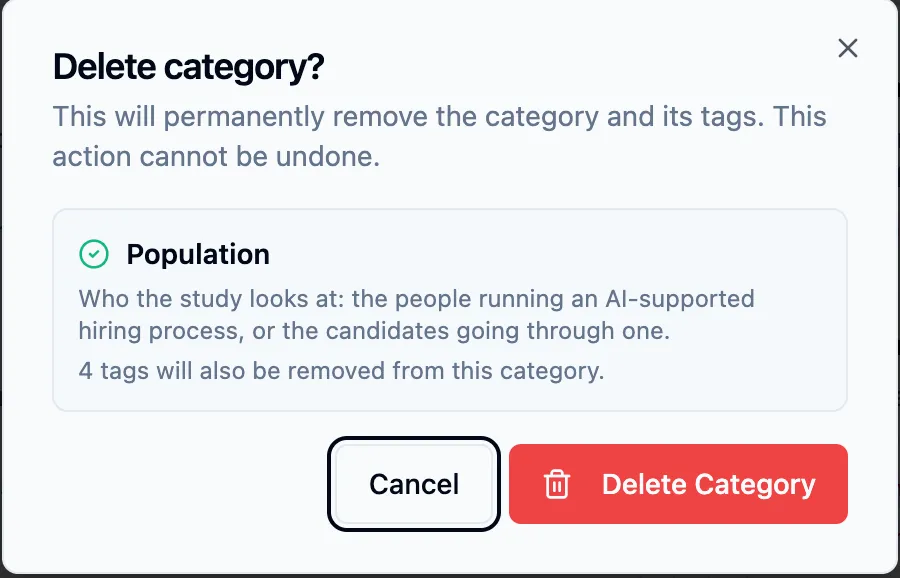
Deleting is guarded. Delete category asks for confirmation and tells you how many tags go with it. But once a category has actually been used — selected on a screening decision, or linked to a PDF highlight — Littview refuses the delete and says so, rather than quietly erasing the justification behind decisions people have already made. To retire such a category, leave it in place; it stops being chosen as soon as reviewers stop selecting it.
Once the list grows, the Search categories or tags… box at the top filters both columns at once by category name, definition text, or tag — useful for checking whether you’ve already covered a concept before adding a near-duplicate. The counters beside it show Total categories, Inclusion, and Exclusion at a glance.
What your criteria drive
Section titled “What your criteria drive”Everything downstream reads this list:
- Screening decisions. Reviewers see your two lists in the decision panel, each category with its definition on hover and its tags as clickable chips. Selections follow the decision: including a paper records inclusion categories, excluding it records exclusion categories.
- PDF evidence. A highlight in the paper can be linked to a specific category, so a reviewer’s reason points at the sentence that produced it. See How to highlight evidence in the PDF.
- AI screening. If you turn it on, the AI suggestion is generated against these criteria and comes back naming the categories it selected — a suggestion the reviewer accepts or overrides. The decision stays yours. See How to configure AI screening.
- Reports. Excluded papers are reported with the exclusion categories that removed them, which is what PRISMA asks you to state, and the Methods section generator drafts your eligibility-criteria paragraph straight from these definitions — on an empty project it sends you here first, with a Set up criteria link.
Next: How to distribute papers to reviewers covers reviews per paper and how the workload is split.