

How to save and reuse criteria sets
Reviews repeat. The next one in the same field usually shares most of its eligibility rules with the last — the same exclusions for reviews and editorials, the same publication window, the same study designs — and retyping them is both slow and a chance to phrase something differently by accident. The Criteria Library solves that: save the criteria you’ve built as a named set, then load it into the next project in two clicks.
The library belongs to your account, not to a project. Sets you save are visible only to you, and they’re available in every project you work on. Nobody else on a review sees your library, and nothing you save leaves it unless you load it somewhere.
Save your criteria as a set
Section titled “Save your criteria as a set”The Save to Library button sits at the top of the Criteria Builder, next to Import from Library. It appears once the project has at least one category — there’s nothing to save before that.
-
Click Save to Library.
-
Give the set a Name. This is what you’ll pick from later, so make it recognisable a year from now — the field is required.
-
Add a Description if you want one. It’s optional, and it shows under the name in the library list.
-
Check the line at the bottom of the dialog: it counts exactly what’s about to be stored, as N inclusion, N exclusion criteria will be saved as a snapshot.
-
Click Save.
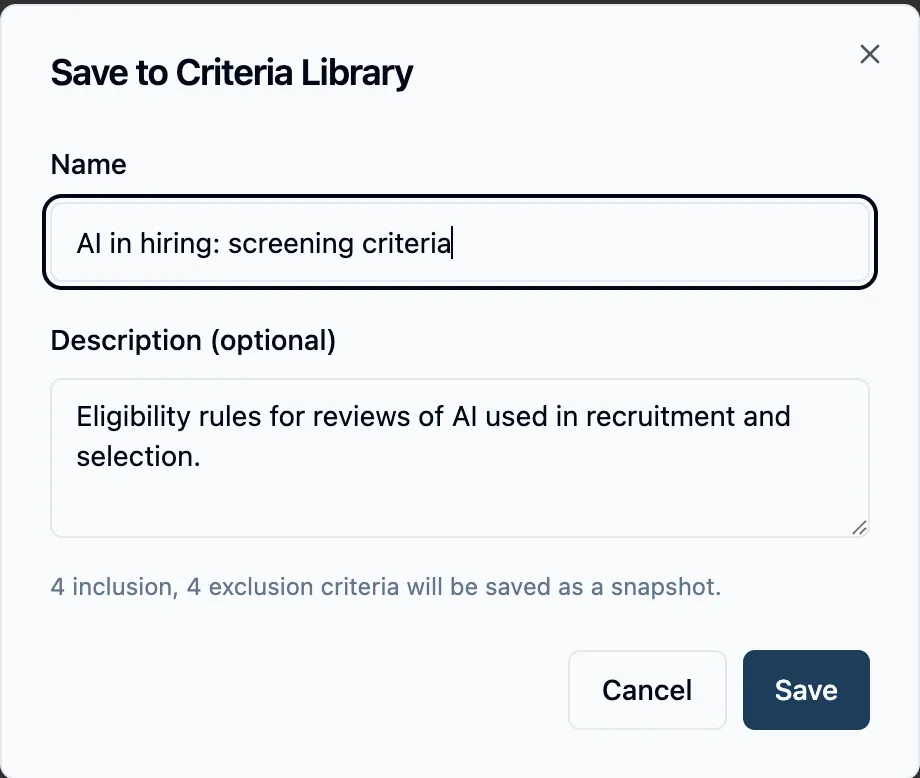
Snapshot is the word that matters. The set stores a copy of your categories, their definitions, and their tags as they are at that moment. Editing the project’s criteria afterwards doesn’t update the saved set, and editing the set doesn’t touch any project you’ve already loaded it into. If you improve a definition and want the improvement kept, save the set again under a new name.
Bring a set into a project
Section titled “Bring a set into a project”-
In the target project, open the Criteria Builder and click Import from Library. The Criteria Library dialog lists every set on your account.
-
Find the set you want and click Use.
-
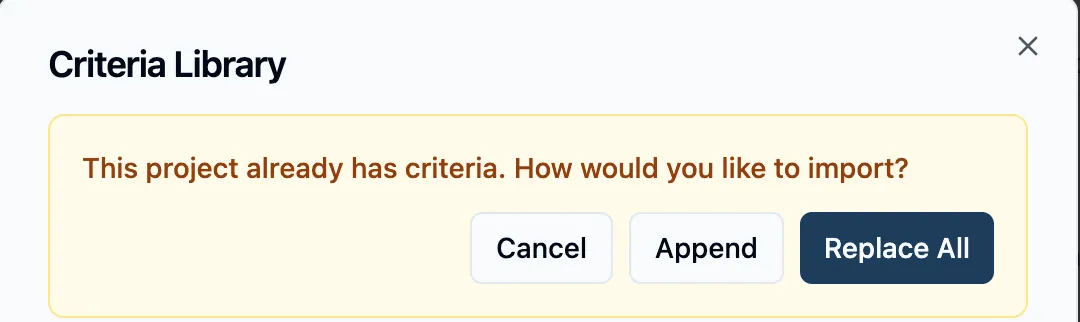
If the project has no criteria yet, the set loads immediately. If it already has some, Littview asks how to merge: This project already has criteria. How would you like to import? — choose Append to add the set alongside what’s there, or Replace All to swap the existing categories for the set’s.
Everything comes across — each category with its definition and its full list of tags, in the order you saved them, split into the inclusion and exclusion columns exactly as before. A progress line reads Importing criteria… while it runs, and a confirmation tells you what happened: Appended 8 criteria from library or Replaced with 8 criteria from library.
Keep your library tidy
Section titled “Keep your library tidy”The Criteria Library dialog is also where you manage what’s in it. Each set shows its name, its description, and a summary line with its inclusion and exclusion counts and when it was last changed. The most recently updated set is at the top, so the one you’re actively iterating on stays in reach.
Two controls sit on every row next to Use:
- The pencil renames the set in place — type over the name and press Enter, or click the check. Renaming doesn’t touch the criteria inside it.
- The trash deletes it, with an inline Delete? confirmation before it goes. Deleting a set never affects a project you already loaded it into; those criteria are the project’s own from the moment they’re imported.
Before you’ve saved anything, the dialog says No saved criteria sets yet and points you back at Save to Library — the two buttons are the two halves of the same loop.
Next: How to distribute papers to reviewers covers reviews per paper and how the workload is split.