

How to screen papers in your queue
Once papers have been distributed, screening is the reviewer’s day-to-day: read each assigned paper, decide it, and record why. This guide walks that loop — your queue, the Screening Workspace, and the shortcuts that keep it fast.
Open your queue
Section titled “Open your queue”In the project sidebar under Screening, click My screening queue. The page lists every paper assigned to you — and only those. Each reviewer works their own queue; nobody screens from anyone else’s list.
The card at the top counts what’s waiting — You have 43 papers waiting for review — and its Start Screening button opens the first of them. Once you’ve begun, the card reads N of M papers left to review instead and the button becomes Continue Screening, which drops you on the first paper still undecided.
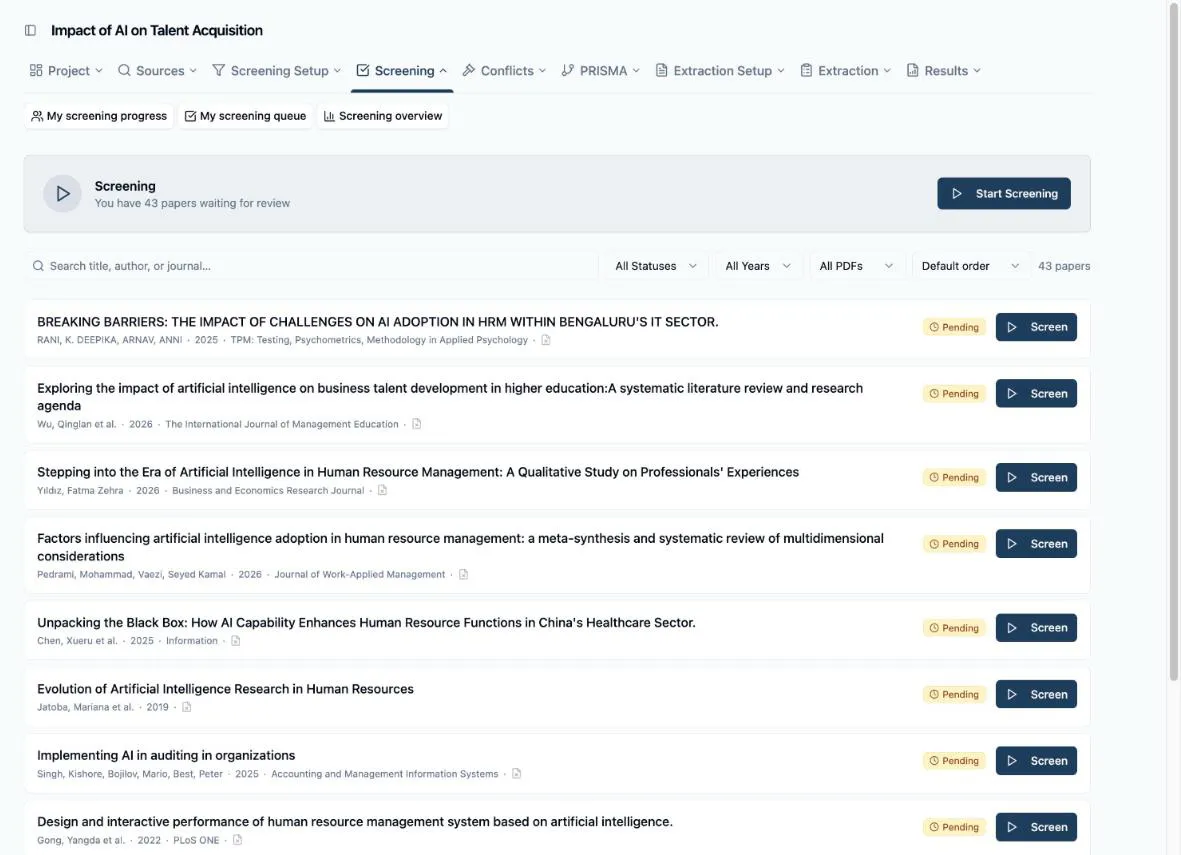
Every row shows the paper’s title, authors, year, and journal, a small document icon that tells you whether a full-text PDF is attached, and a status badge: Pending, Included, Excluded, or Saved. Pending papers carry a Screen button; decided ones a View button that reopens them.
The toolbar searches by title, author, or journal and filters by status, publication year, and PDF availability. Two filters earn their place in daily use: Saved for Later brings back the papers you parked, and the Oldest decision / Newest decision sort orders your decided papers by when you called them, so revisiting early calls doesn’t mean hunting for them.
The Screening Workspace
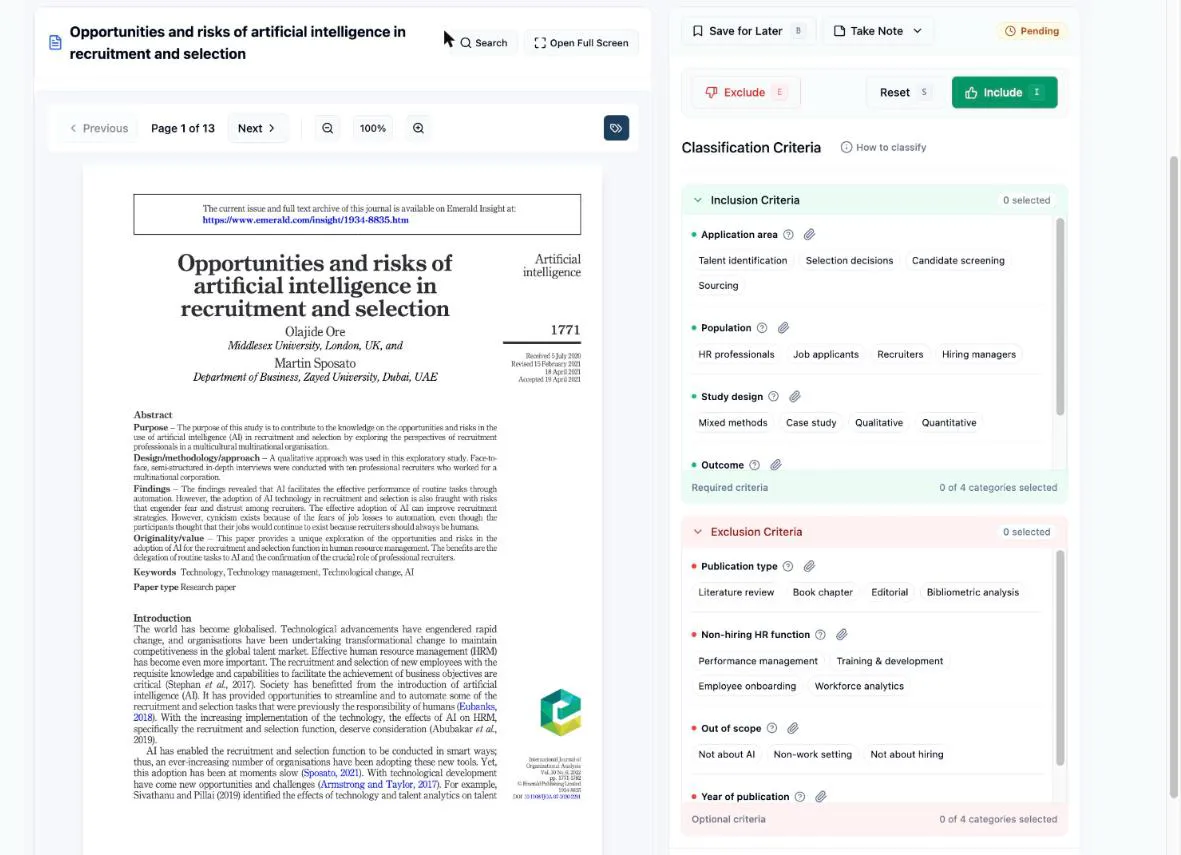
Section titled “The Screening Workspace”Opening a paper lands you in the Screening Workspace: the paper on the left, your screening panel on the right, with a divider you can drag to give either side more room.
When a PDF is attached, the left panel is a full viewer — read, search, and highlight without leaving the decision you’re building on the right.
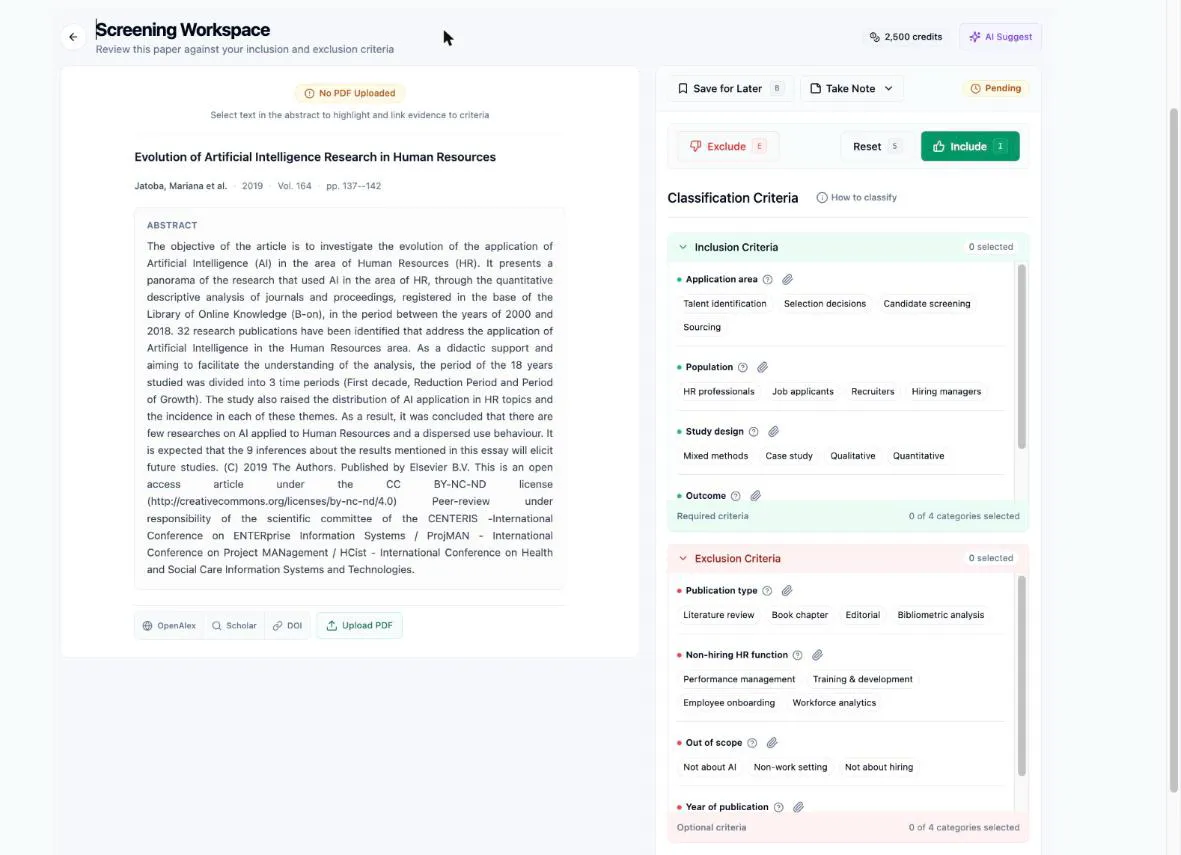
When there’s no PDF, the panel shows the reference itself — title, metadata, and abstract — under a No PDF Uploaded badge. That’s exactly what title-and-abstract screening needs, and the link bar underneath helps when it isn’t: OpenAlex and Scholar look the paper up for you, and Publisher and DOI appear whenever the reference carries them. If you track down the full text, Upload PDF attaches it on the spot and the panel becomes the viewer; if the abstract itself is missing, Add abstract lets you paste one in for everyone screening this paper.
Select the criteria that justify your call
Section titled “Select the criteria that justify your call”The right panel lists the project’s criteria in two sections, Inclusion Criteria and Exclusion Criteria — each category with its tags as clickable pills. Click the tags that apply to this paper: selecting a tag marks its category Selected, and each section header counts how many of its categories you’ve marked. If a category’s meaning isn’t obvious, hover the help icon beside it to read the definition written in the Criteria Builder.
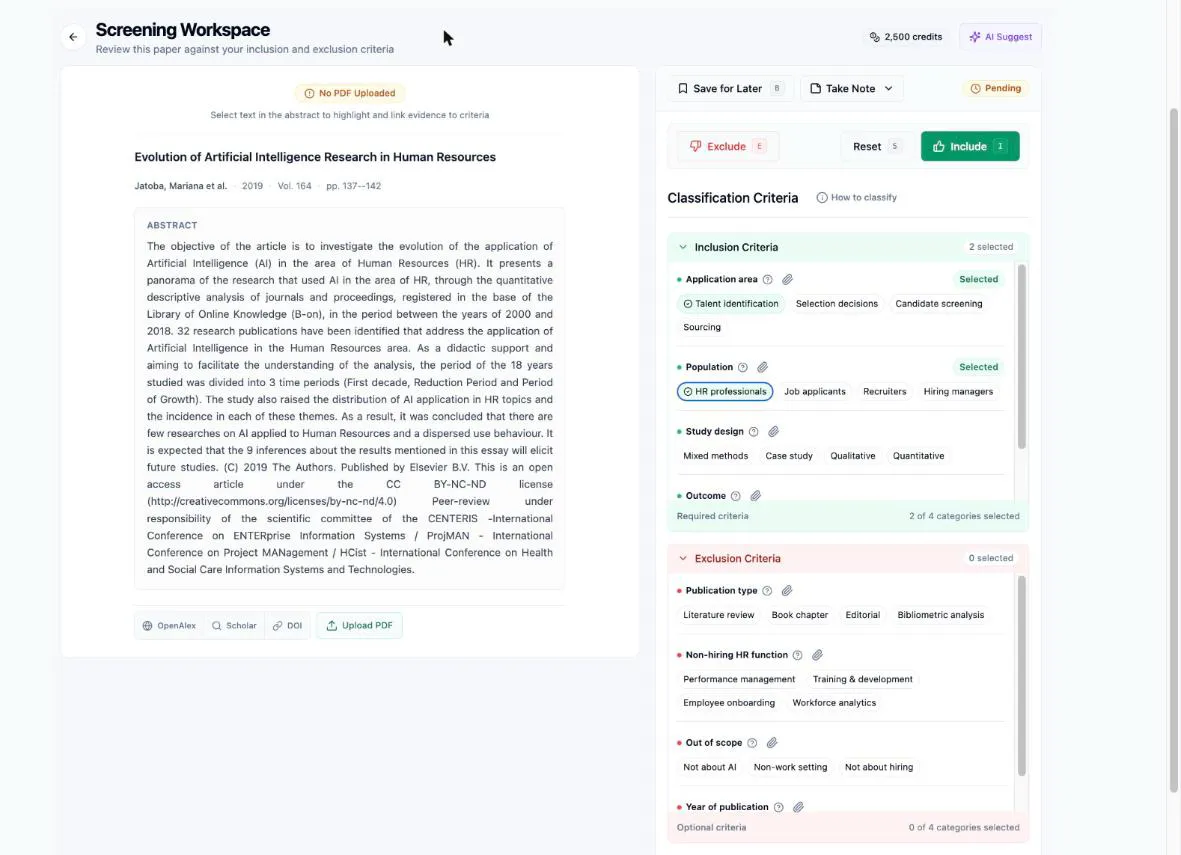
These selections are the justification that travels with your decision — into the conflict workspace when reviewers disagree, the excluded-papers report, and the Methods section Littview drafts from your project. Littview won’t block a decision with nothing selected, but an unjustified call is one you’ll end up re-arguing from memory later.
Each category also carries a small paperclip button for linking highlighted passages to it as evidence — How to highlight evidence in the PDF covers that.
Record the decision
Section titled “Record the decision”The decision row sits above the criteria: Exclude, Reset, and Include, each with its keyboard key printed on the button.
-
Read the paper and select the tags that apply.
-
Click Include (or press I) or Exclude (E). The badge at the top of the panel flips from Pending to Included or Excluded, and the decision saves with your selections — only the matching section’s: an Include records your inclusion marks, an Exclude your exclusion marks, and pills on the opposite side clear so the record stays unambiguous.
-
Press → or click Next to move straight to your next paper.
Not sure yet? Save for Later (B) parks the paper: its badge turns Saved, it still counts toward your papers left to review, and the queue’s Saved for Later filter is how you come back to it.
Want a clean slate? Reset (S) returns the paper to Pending.
Notes travel with the paper too. Take Note opens the notes section, and the padlock toggle on a note sets who reads it: private (only visible to you) or shared (visible to project members). Saved notes reopen with the paper, and the button becomes Notes (2) so you can spot annotated papers at a glance.
Changed your mind? Reopen a decided paper from the queue (View) and click the other decision — or just adjust its tags: edits on a decided paper save themselves, with a Saving… → All changes saved indicator in the panel header confirming it. Your updated selections are what the conflict workspace and reports will quote.
Keep moving
Section titled “Keep moving”The footer tallies your progress — 12 reviewed / 43 total — and Next always jumps to the next paper you haven’t decided or saved, skipping the rest. When Next goes quiet, your queue is done except for anything parked as Saved.
The shortcuts, all printed on their buttons: I include, E exclude, B save for later, S reset, → next. They pause automatically while you’re typing in a note or search box, so there’s no way to exclude a paper mid-sentence.
Your decisions land everywhere they’re needed the moment you make them: your queue badges, your progress dashboard, and the project’s screening totals. Where your call disagrees with another reviewer’s on the same paper, Littview flags it for conflict resolution — no spreadsheet reconciliation at the end.
Next: How to highlight evidence in the PDF — tying the passages that convinced you to the criteria they support.